How to Start Using Web3 on a React Frontend App
Part 1: Setting up a React application
First, let's set up our front end using React.
Whenever I need to work with React I usually go with Next.js, I like the framework, it’s really easy to start with, it's well-documented and there is a big community behind it. That’s why I’ll use it for this demo. Let’s go to their next.js setup page and copy the command to create our next.js application:
$ npx create-next-app@latest nextjs-blog --use-npm --example "https://github.com/vercel/next-learn/tree/master/basics/learn-starter"Let’s change nextjs-blog for demo-react-web3, this will be the name of the folder where our project will be saved. It really could be any name, for now, I’m going with demo-react-web3. The command should look like this:
$ npx create-next-app@latest demo-react-web3 --use-npm --example "https://github.com/vercel/next-learn/tree/master/basics/learn-starter"That command will clone some files and folders into the folder: demo-react-web3, it will also install the node.js dependencies defined in package.json, start a new git repository and even make a first commit.
Once it is done, you will see an output like this:
We suggest that you begin by typing:

 cd demo-react-web3
 npm run dev
Let’s do that:
- Move inside the folder:
cd demo-react-web3- Start the application:
npm run dev

 > @ dev ~/demo-react-web3
 > next dev

 ready - started server on 0.0.0.0:3000, url: http://localhost:3000
As you can see, npm run dev is an alias for next dev. This command will start a dev server for us and the good thing is that it comes with hot reload, so if we do any changes in the codebase the browser will refresh automatically. Alright, let’s go to http://localhost:3000 (opens in a new tab), and we should get an initial page like this one:
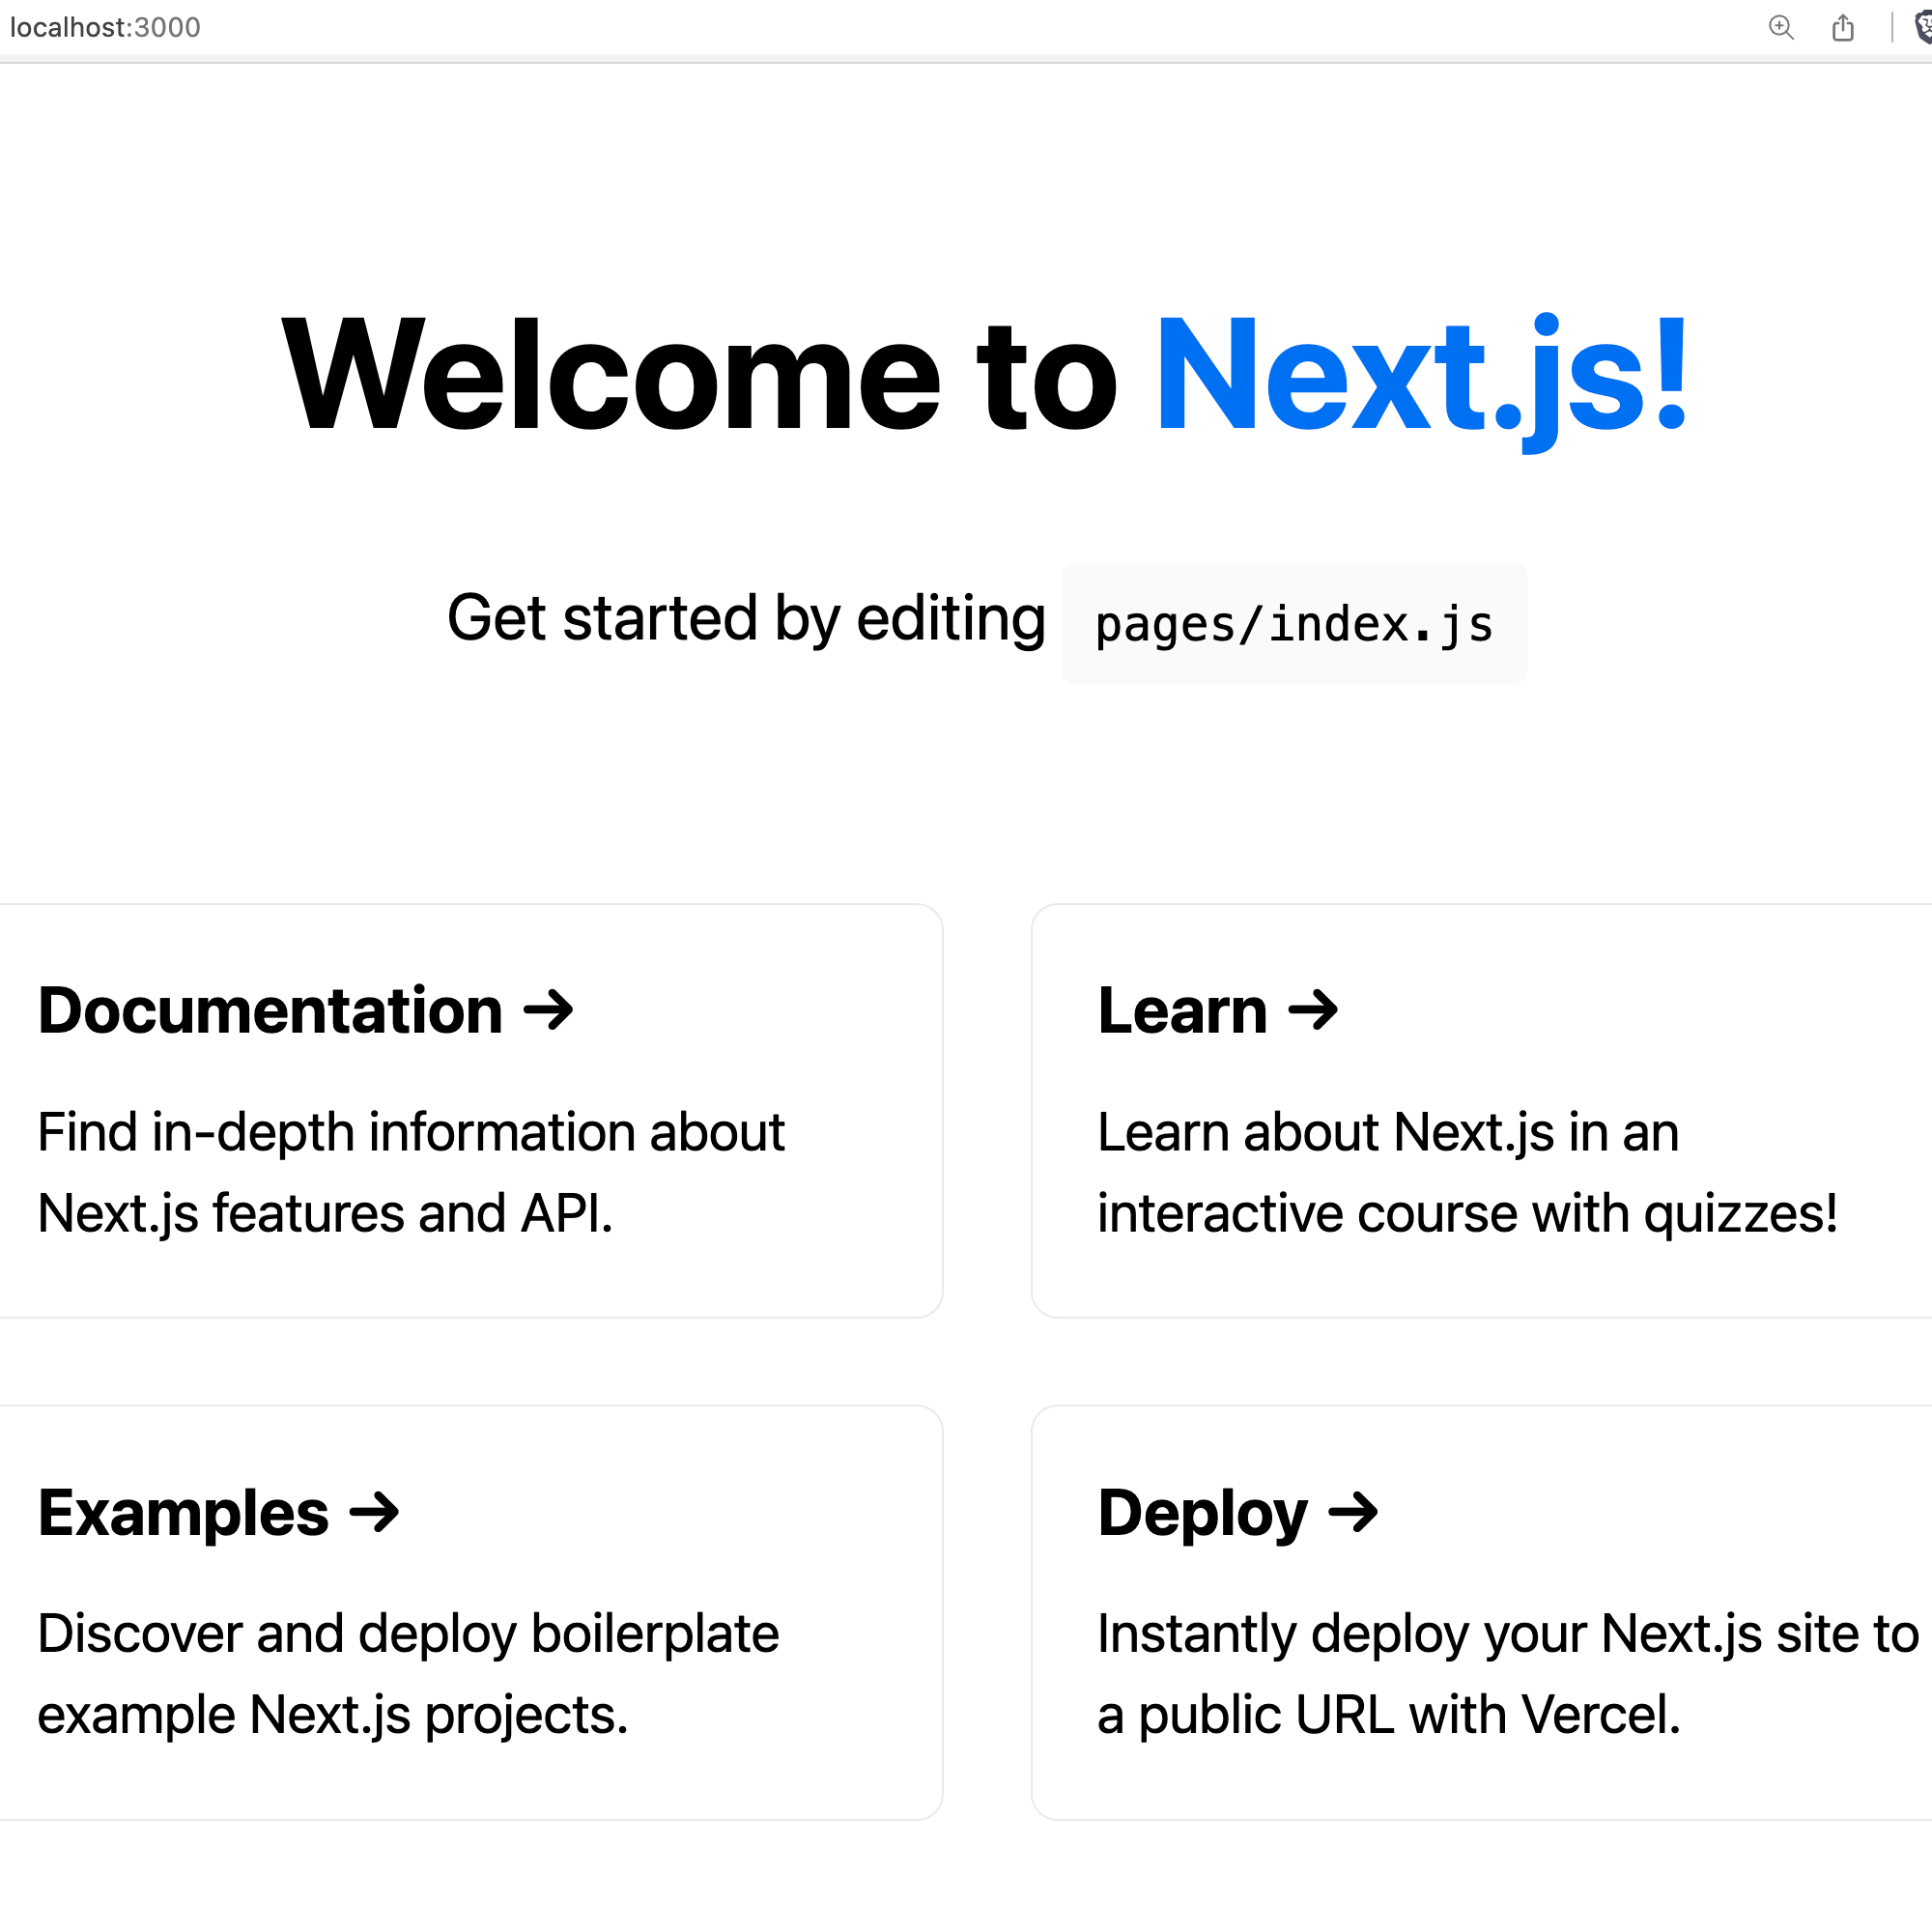 Fig. 1: Next.js welcome page
Awesome, our front end is running, that was easy, I suspect most of you already knew how to do that, so let's get to the real deal.
Part 2: Installing Metamask
To work with Web3, we'll use Metamask.
Metamask is a browser extension that injects an object called ethereum into the browser. This ethereum object comes with multiple functions that will allow us to interact with the blockchain. We'll use one of the simplest functions:
ethereum.request({ method: 'eth_requestAccounts' })But before jumping into the code, let’s install Metamask. We need to go to their download (opens in a new tab) page and once there, just click Install, you should see something like this:
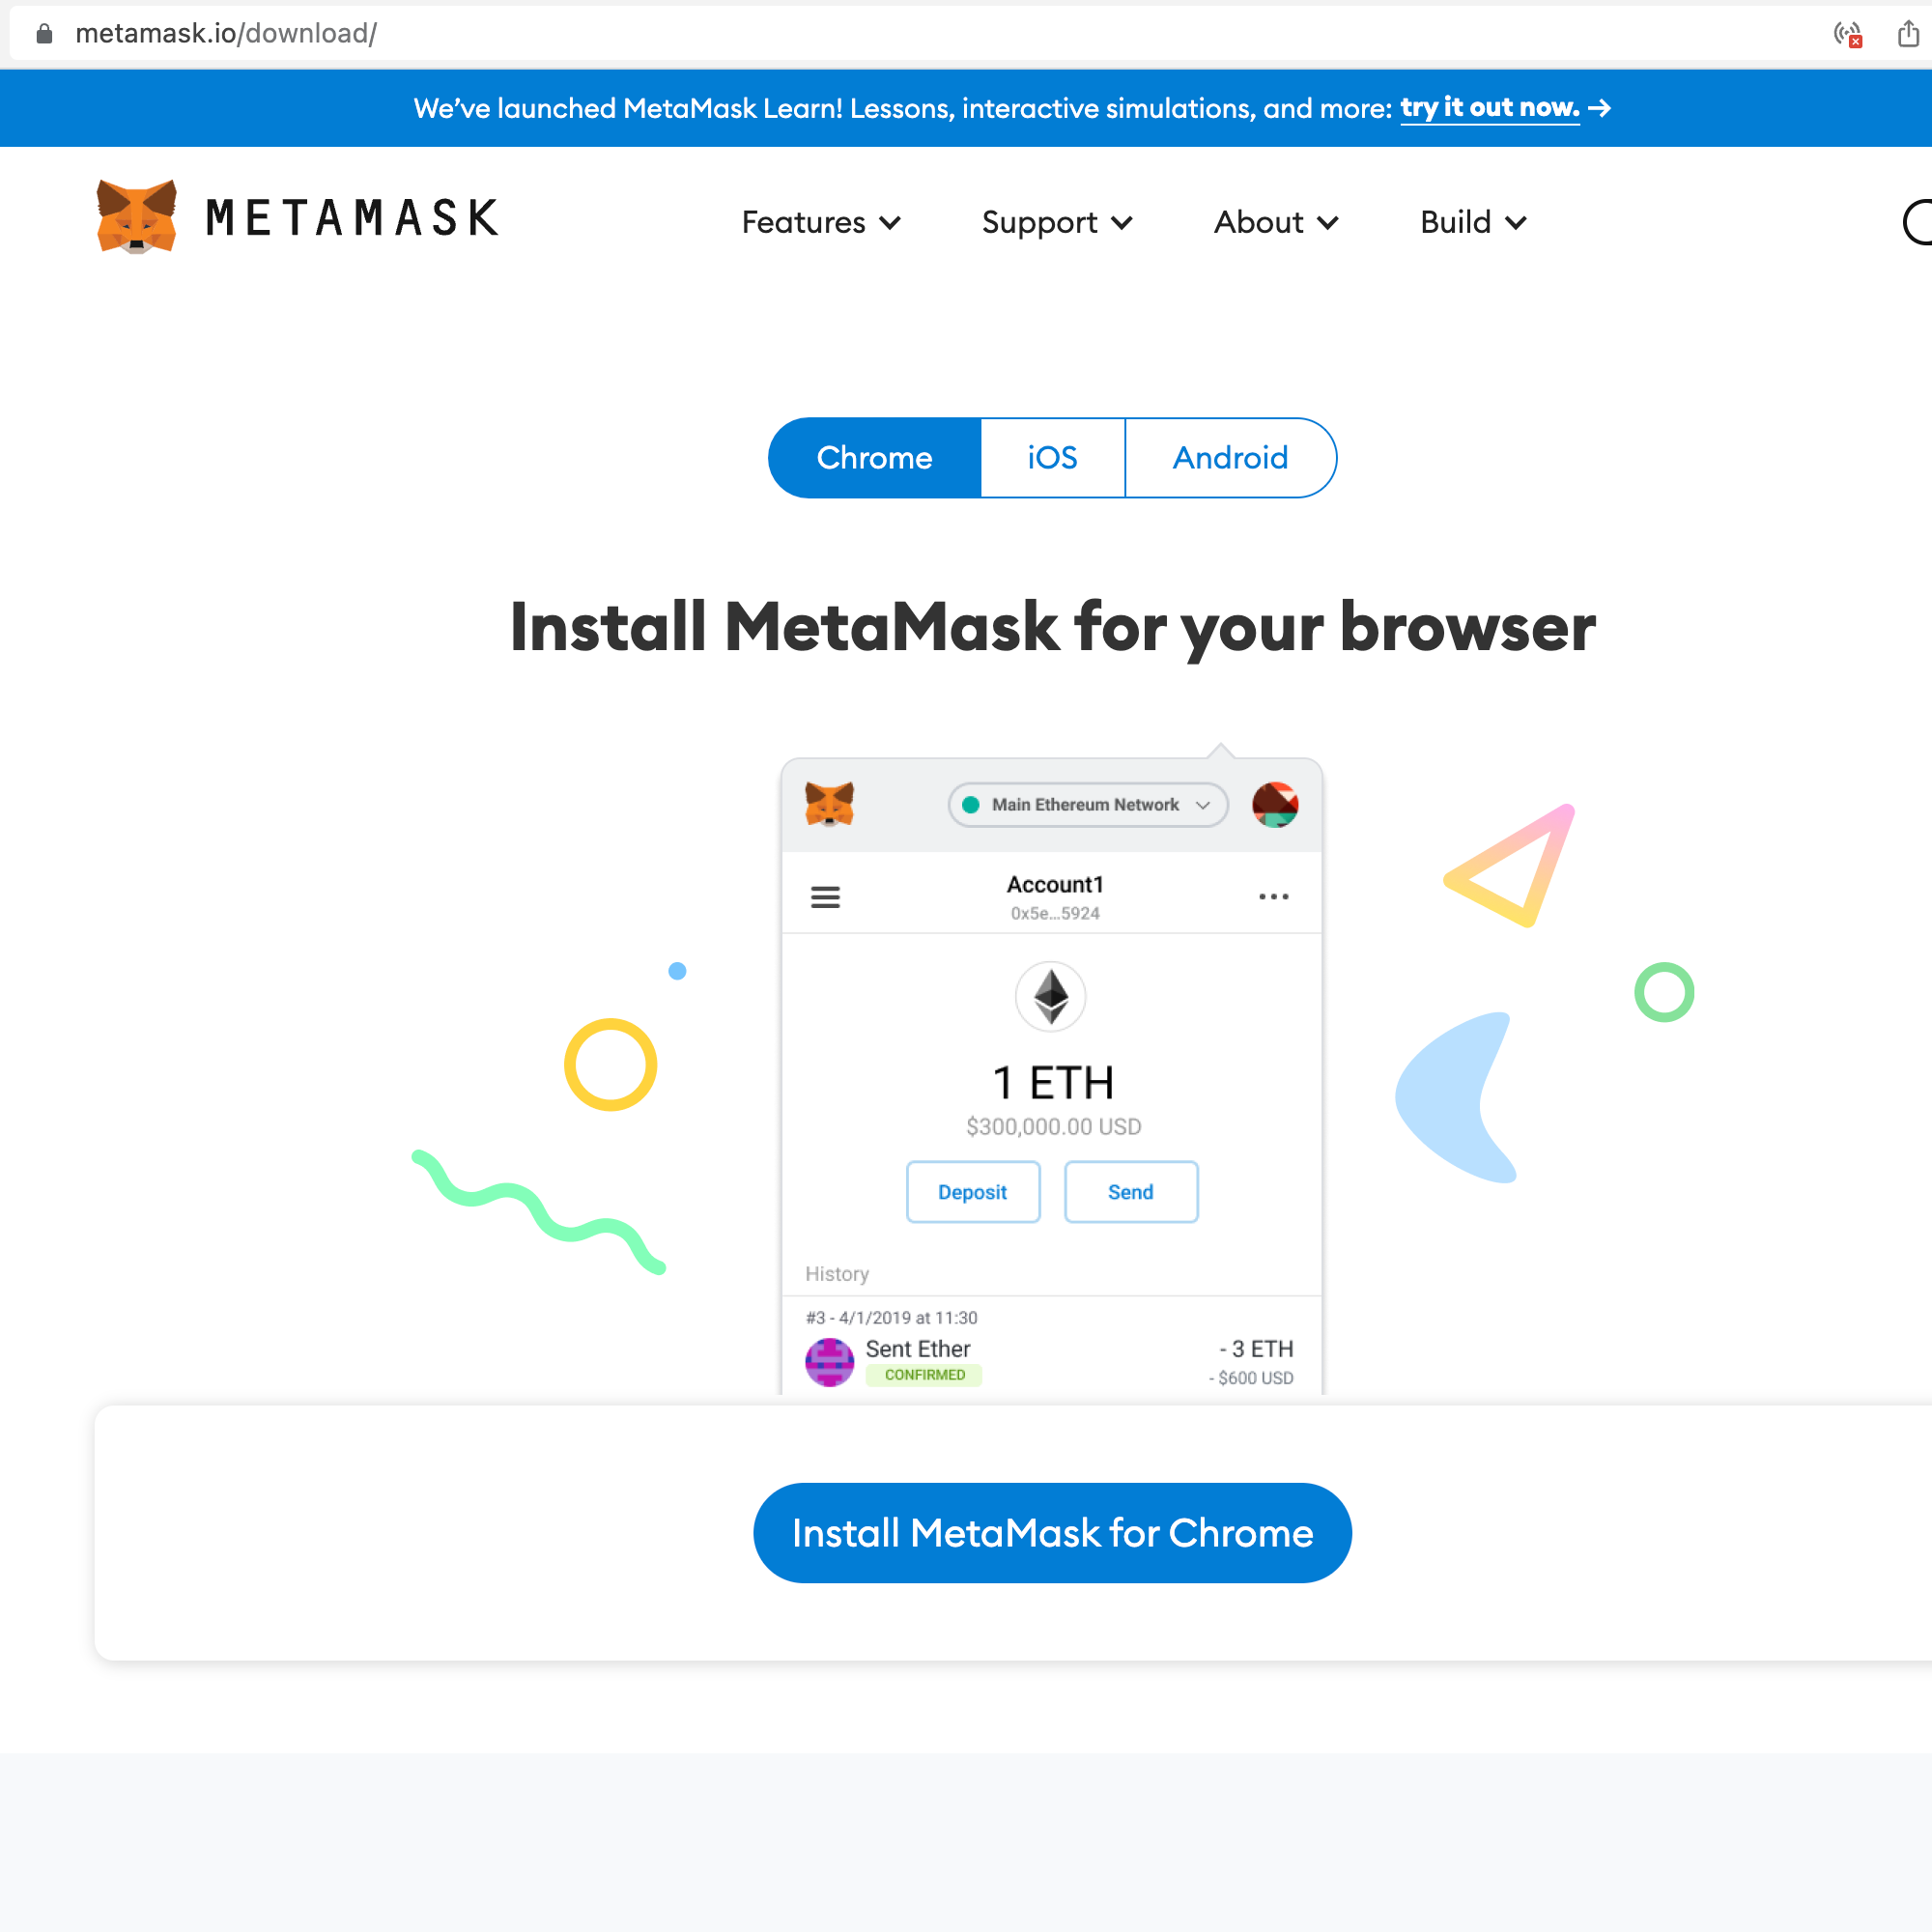 Fig. 2: Metamask download page
See the .gif below to follow the steps needed in order to install Metamask, some steps are intentionally skipped to keep it simple, but at some point, you might want to do them.
 Fig. 3: Metamask installation steps
Once installed, a Metamask icon will appear on your browser, mine looks like this:
Now, let’s switch back to the tab where our Next.js application is running, open your browser console, type in: ethereum, hit enter, and you should see an object, something like this:
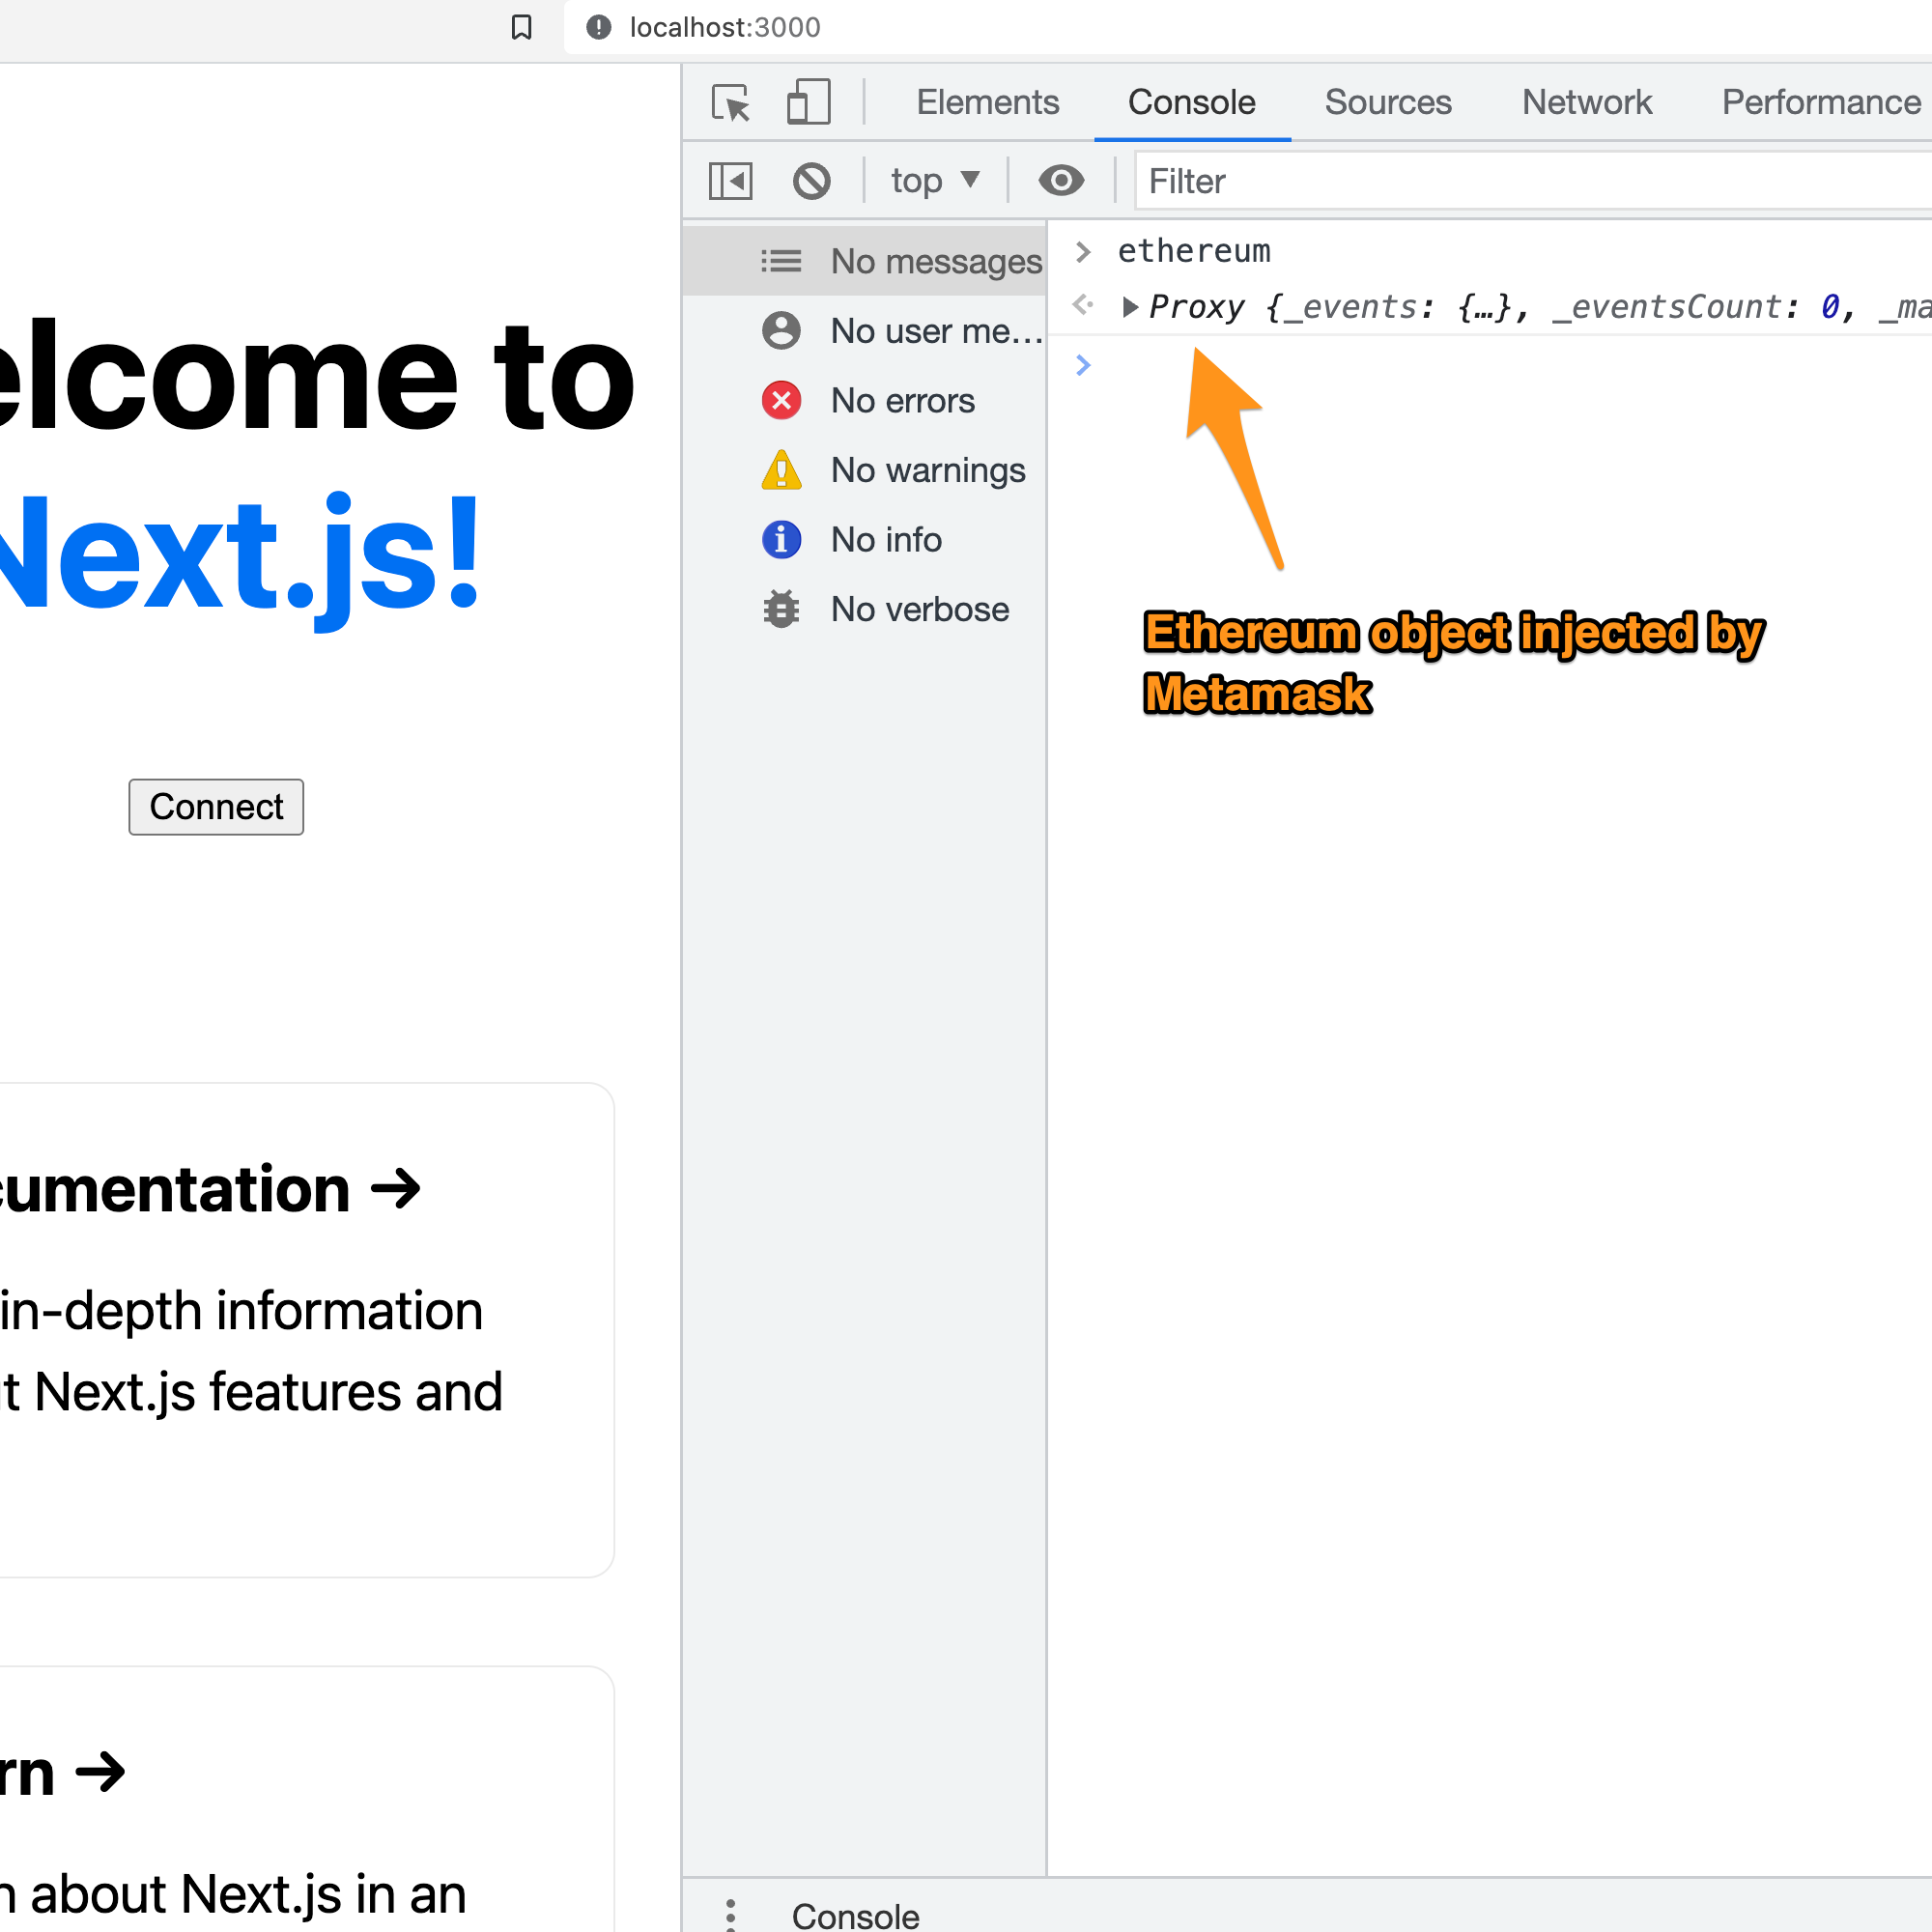 Fig. 5: Ethereum object injected by Metamask
Awesome, so far we have a React app running, using Next.js and an ethereum object in the browser injected by Metamask.
If you remove the Metamask extension, then the ethereum object will go away. There are other tools, similar to Metamask that inject a similar Web3 object. This Web3 object: ethereum, lets us interact with the blockchain, meaning we can sign in transactions, transfer tokens, execute smart contracts functions, and more.
Something else to mention is that at the moment, most Web3 interaction happens on desktop. On mobile, you still can install Metamask and other mobile applications, however platforms (Android and Apple) still have some restrictions about cryptocurrencies, so for now let’s just focus on desktop.
Part 3: Adding Web3 to your React Application
As you can see, Metamask works with Ethereum, which in terms of Web3 is where most of the development happens. Similar to Metamask, other applications let you connect with other networks like Solana, but for now let's focus on Ethereum.
We are going to do some changes to our Next.js application and start playing a bit with the ethereum object.
Let’s go to our pages/index.js file, and replace the line that says Get started by editing..., let’s remove that and add a connect button, it should look like this:
Snippet 1: Adding a button
// pages/index.js

...

<p className={styles.description}>
  <button onClick={connectHandler}>Connect</button>
</p>

...
Of course, our React application is going to complain about connectHandler not being defined. This is another cool thing about Next.js. It comes with a code checker, which helps us to avoid silly mistakes. Alright, let’s add the handler function:
Snippet 2: Defining an empty click handler
 // pages/index.js

 ...

export default function Home() {
  const connectHandler = () => {

  }

  return (
    ...
Now the React application should be happy, and it should render something like this:
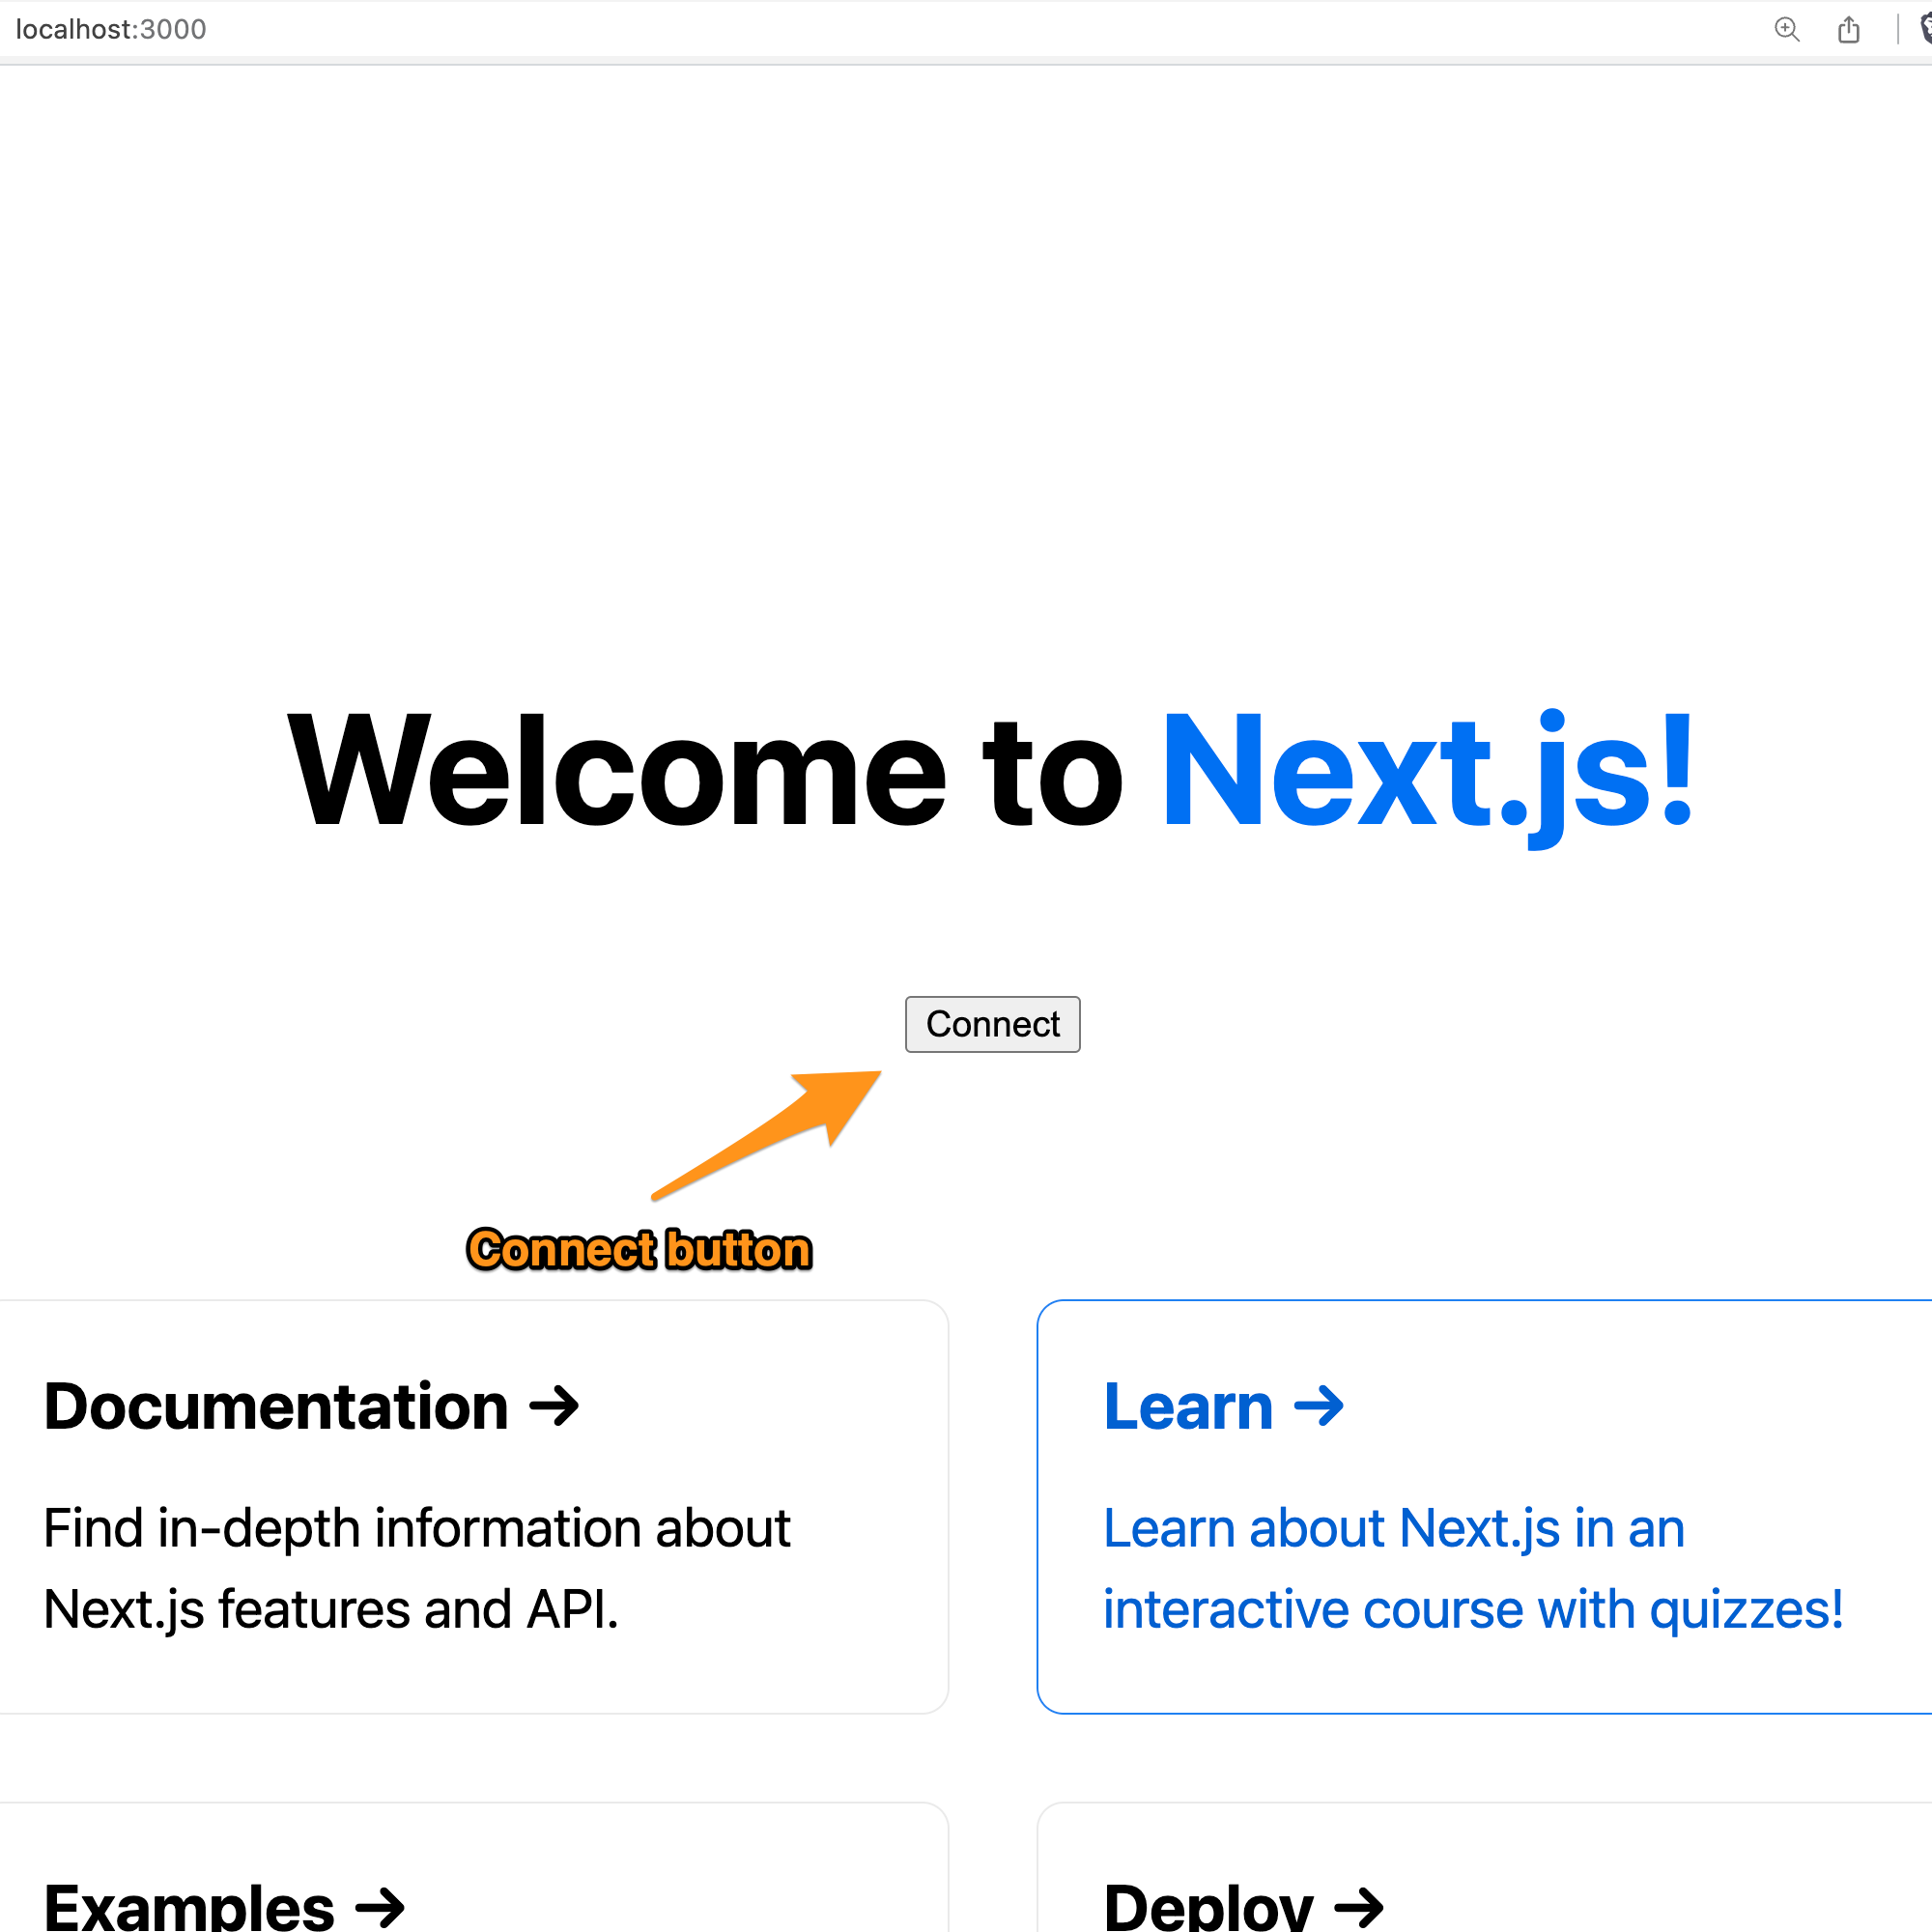 Fig. 6: Metamask connect button
Nice, but the connect button doesn’t do anything. Let’s add our first Web3 method, which we’ll see on most of the Web3 applications. Our connectHandler now should look like this:
Snippet 3: Setting a connect method that calls eth_requestAccounts
 // pages/index.js

 const connectHandler = async () => {
   try {
     const accounts = await ethereum.request({ method: "eth_requestAccounts" });
     console.log(accounts)
   } catch (error) {
     console.log(error);
   }
 };

  ...
As you can see, ethereum.request returns a promise. That’s why we are using async/await. Since things could go wrong, a try/catch block was added to catch and log any error. One of the most common errors is when a user doesn't provide access to their wallet. If the user provides access then we should see a log of an array, the array should include your account, something like this:
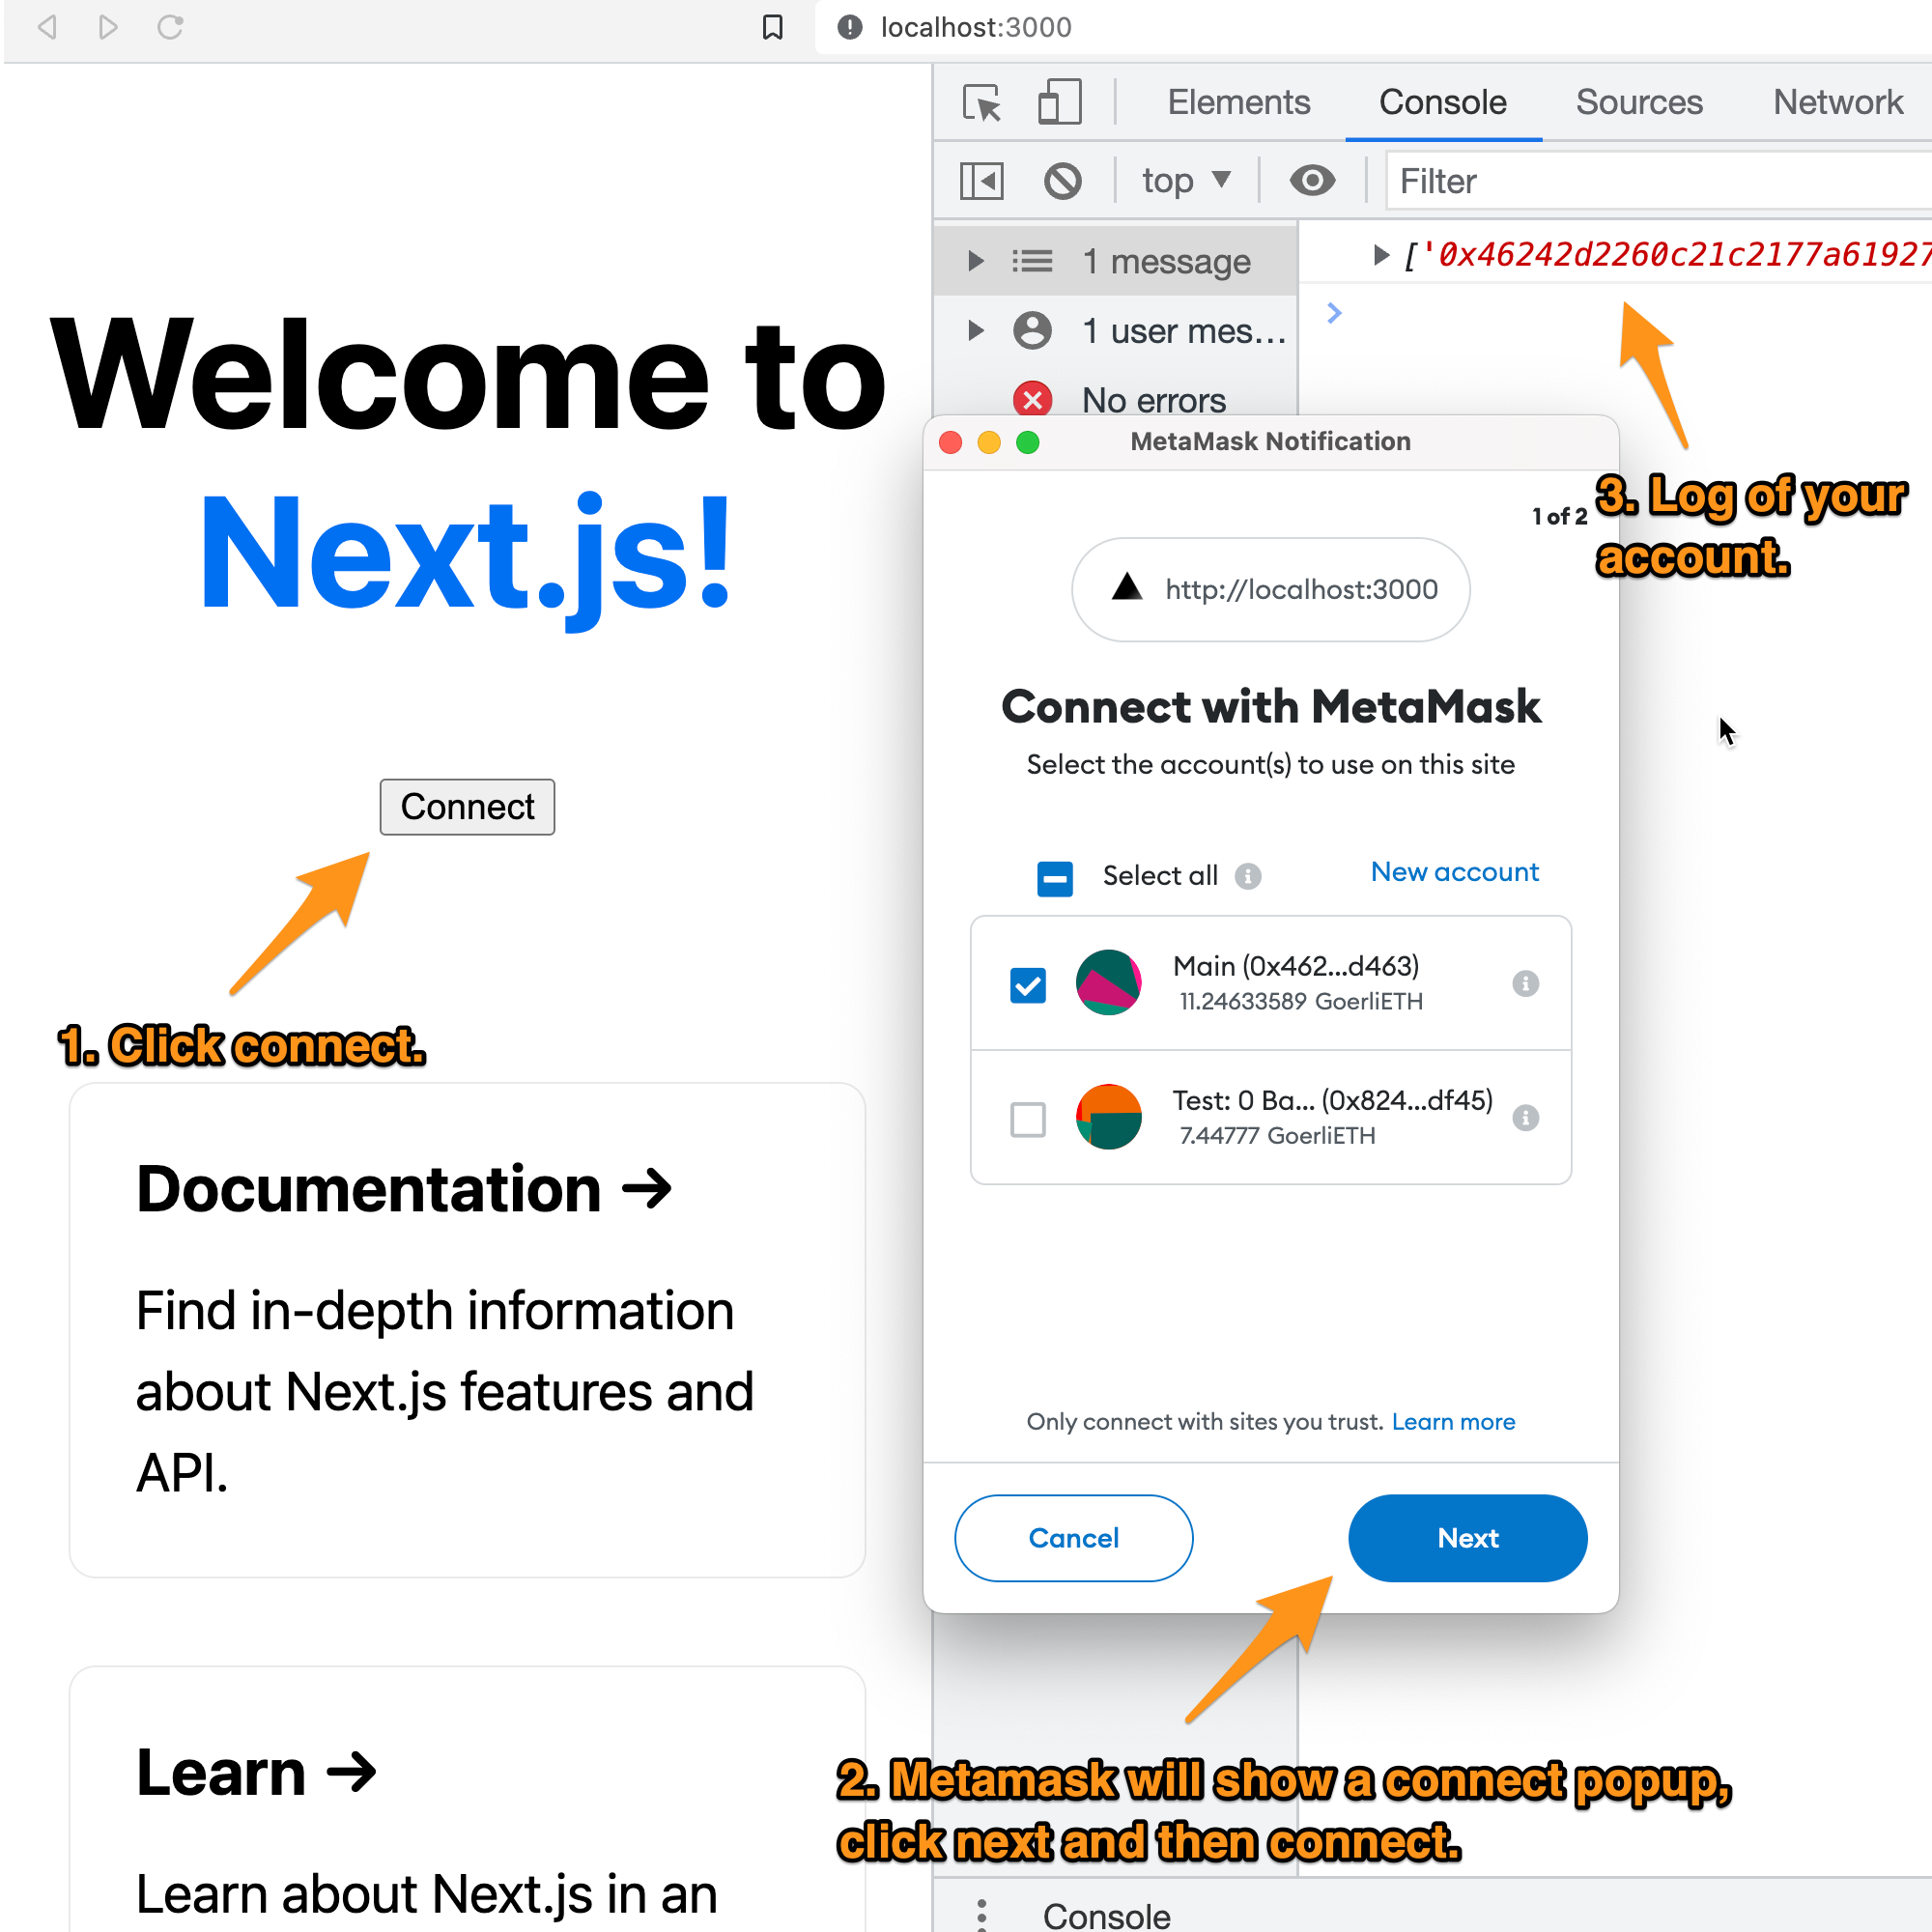 Fig. 7: Steps to connect your Ethereum wallet
Alright, before continuing let’s quickly talk about: Wallet and Web2.
A wallet is a tool, in this case: Metamask, that lets you create accounts for free. In the Web2 space, there are companies like Google or Microsoft that offer you free accounts in exchange for hosting your data with them. With blockchain, the network itself knows how to create an account. Metamask is just an intermediary that makes things easy. Metamask doesn’t own the account or the data, the account is owned by whoever has the private keys. In blockchain, you need to have an account to interact with the ecosystem.
Web2 is just the name the community gave to the web applications that don’t interact with Blockchain. Therefore any web application interacting with blockchain is considered a Web3 application. Let’s just say that Web3 is about decentralization, so far we can confirm this with the account creation, there’s no company behind it, the technology, in this case: Blockchain comes with that functionality by default. Decentralization and transparency are two keywords you will hear often.
Alright, back to the tutorial. So far we have a React application running, the Metamask extension installed on our browser and our React application executing a Web3 method. Although this is a simple demo, this is the base of any Web3 application. From here on, it's just about adding more frontend features and using more Web3 functions.
Something to consider is that at this point our accounts don’t have any balance. For this tutorial, we won’t need any. The functions we are using are considered reads, and reads are free in Ethereum.
Let's make our front end a bit cleaner. Let's remove most of the things found in pages/index.js. Leaving the component with just a title, subtitle, and button, it should look like this:
Snippet 4: Clean version of pages/index.js
 // pages/index.js

 import Head from "next/head";
 import styles from "../styles/Home.module.css";

 export default function Home() {
  const connectHandler = async () => {
    try {
      const accounts = await ethereum.request({
        method: "eth_requestAccounts",
      });
      console.log(accounts);
    } catch (error) {
    console.log(error);
   }
  };

  return (
   <div className={styles.container}>
     <Head>
       <title>Demo React Web3</title>
       <link rel="icon" href="/favicon.ico" />
     </Head>

     <main>
       <h1 className={styles.title}>Welcome</h1>

       <p className={styles.description}>
         How to start using Web3 on your React application.
       </p>

       <p className={styles.description}>
         <button onClick={connectHandler}>Connect</button>
       </p>
     </main>

     <style jsx>{`
       main {
         padding: 5rem 0;
         flex: 1;
         display: flex;
         flex-direction: column;
         justify-content: center;
         align-items: center;
       }
     `}</style>

     <style jsx global>{`
       html,
       body {
         padding: 0;
         margin: 0;
         font-family: -apple-system, BlinkMacSystemFont, Segoe UI, Roboto,
           Oxygen, Ubuntu, Cantarell, Fira Sans, Droid Sans, Helvetica Neue,
           sans-serif;
       }
       * {
         box-sizing: border-box;
       }
     `}</style>
   </div>
  );
 }
We are cleaning our homepage and just leaving the welcome title and message. At this point our frontend should look like this:
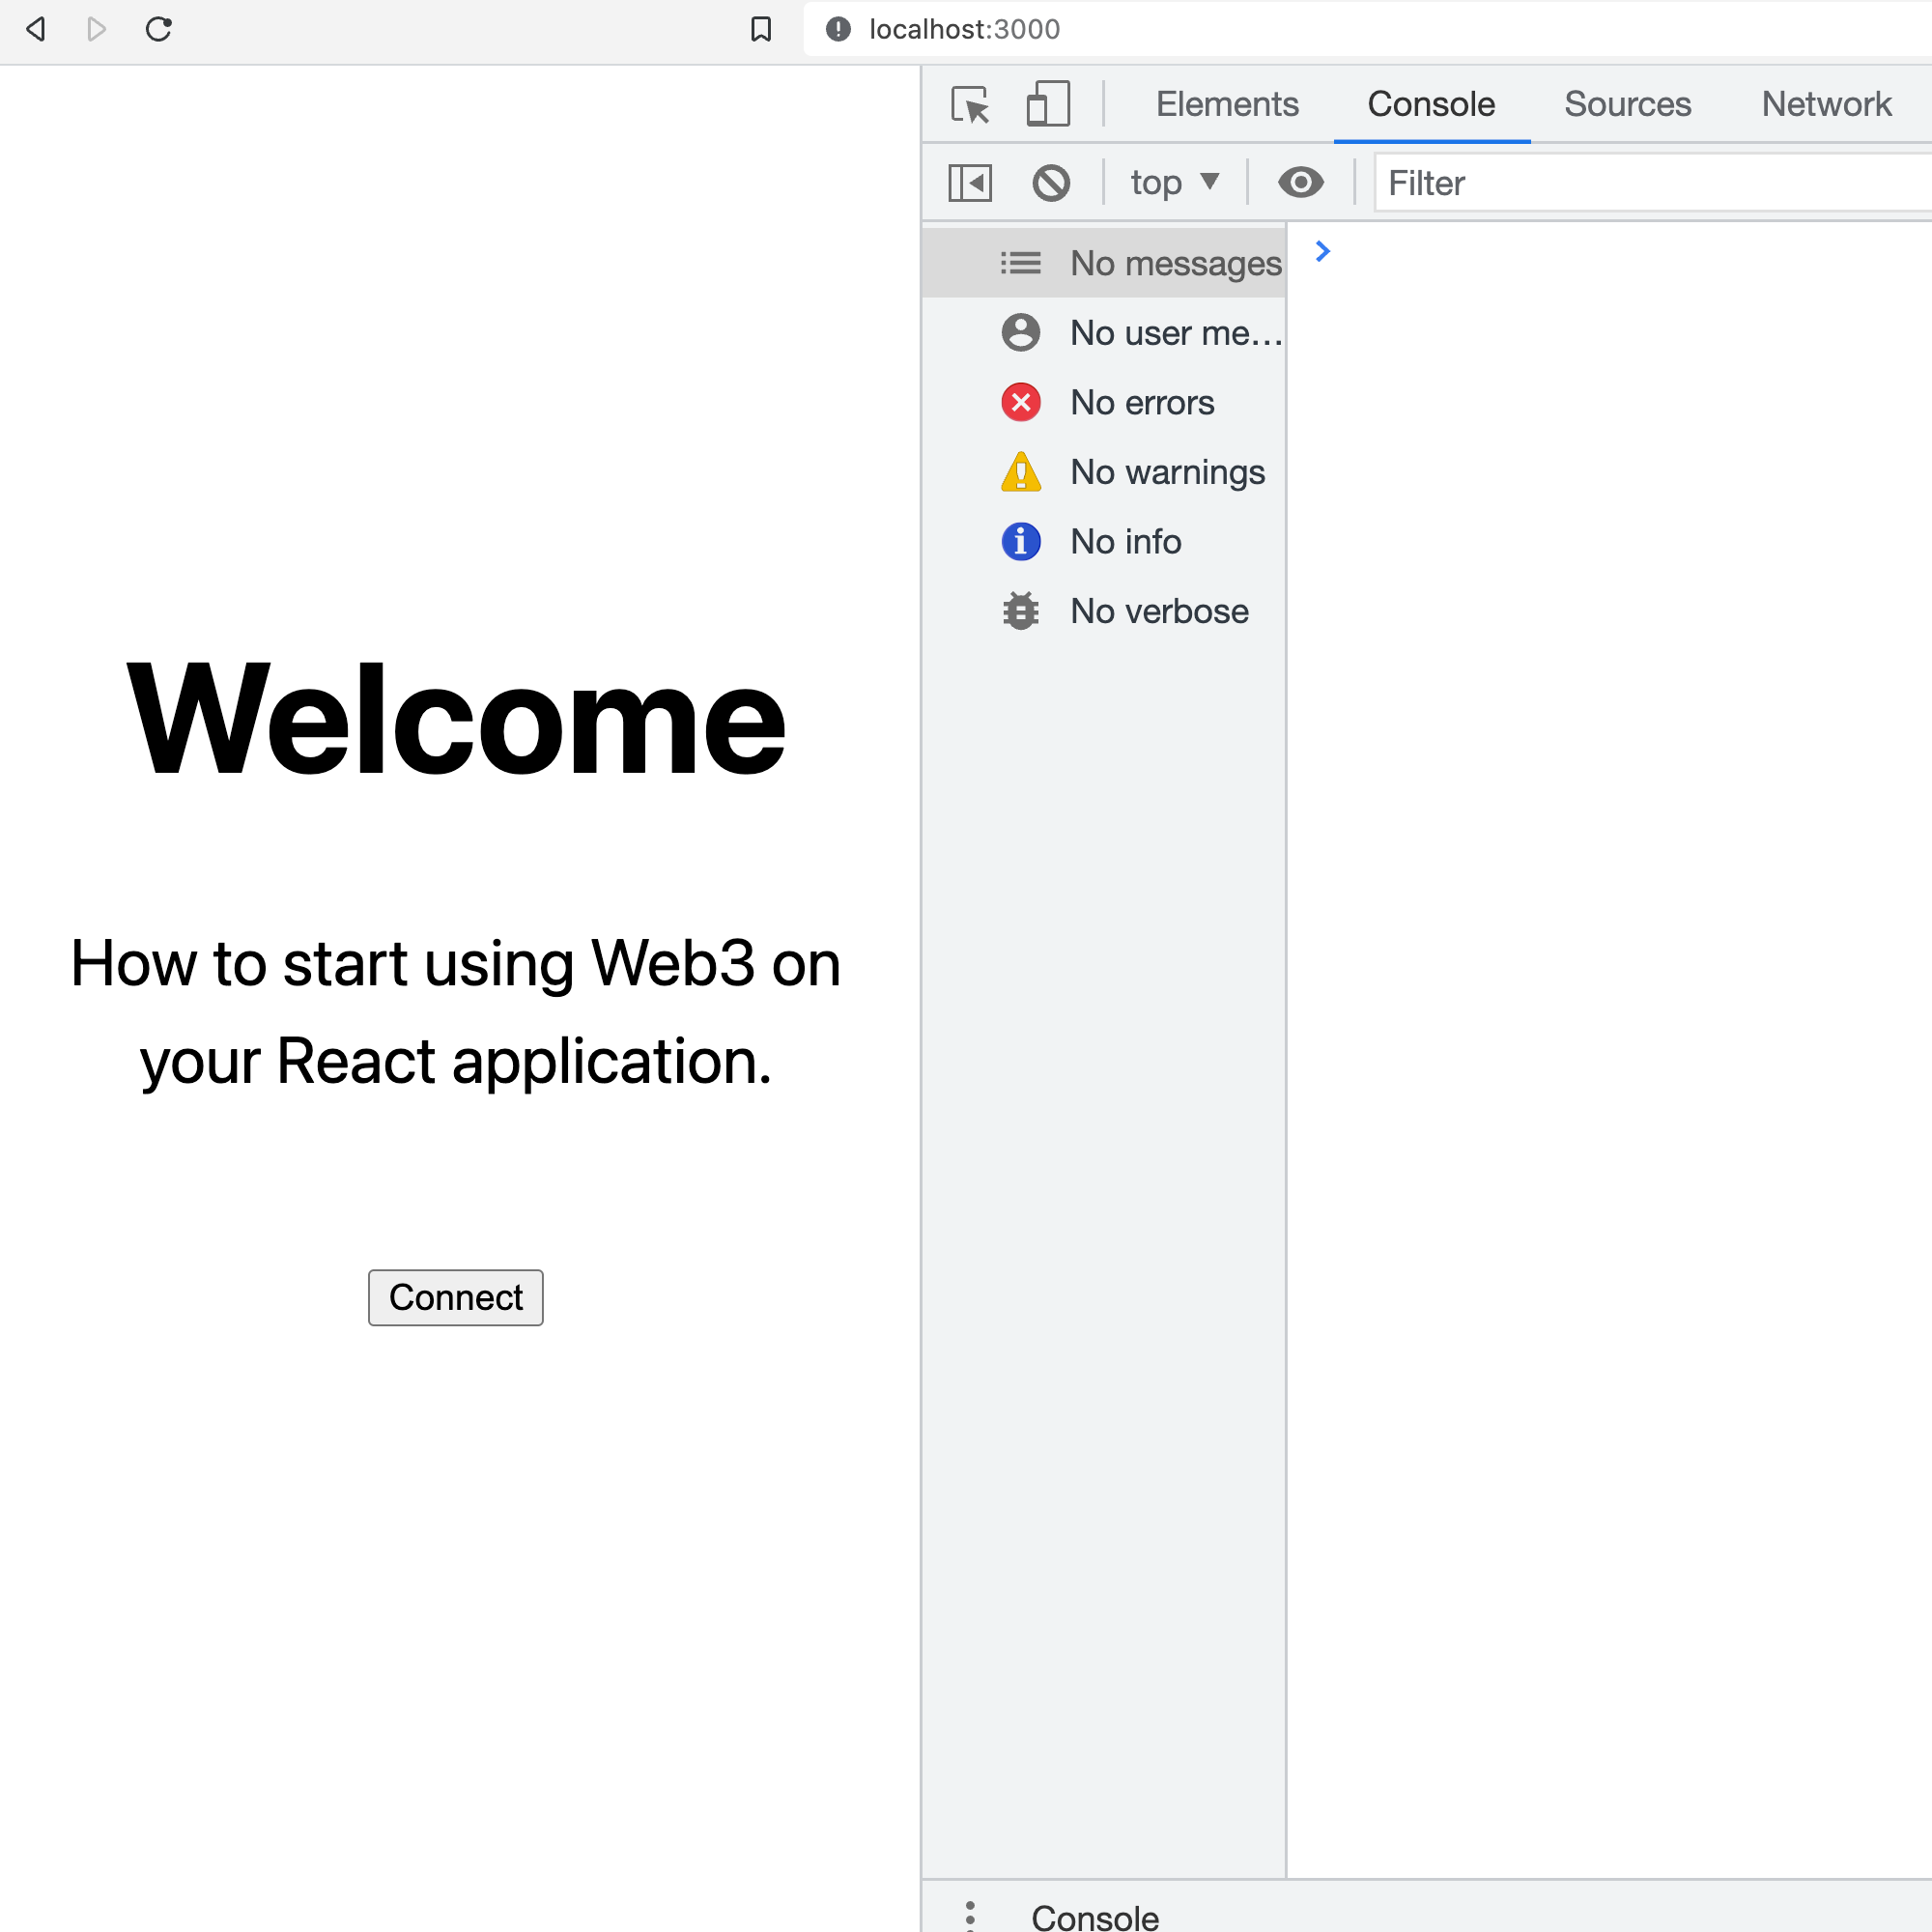 Fig. 8: A cleaner version of our React application
Nothing fancy, but just for fun, let’s update the background color using the React hook (opens in a new tab) useState. Whenever someone clicks the connect button, we want to change the background color to black ⬛.
The goal is to start playing with eth_requestAccounts, which is a Web3 method. OK, we need to add a couple of lines:
Snippet 5: Toggle walletConnected boolean flag with React hook useState when the user clicks the connect button
 // pages/index.js

 import { useState } from "react";
 ...

 export default function Home() {
   const [walletConnected, setWalletConnected]  = useState(false)

   const login = (accounts) => {
     setWalletConnected(!!accounts.length);
   };

   const connectHandler = async () => {
     try {
       const accounts = await ethereum.request({
         method: "eth_requestAccounts",
       });
       login(accounts);
       ...
The initial state is false, but that should switch to true once the user gives access to their wallet.
When the button is clicked, the handler makes a call to eth_requestAccounts, which the user needs to authorize. Once authorized, the method fulfills a promise with an array of connected accounts. In this tutorial, we are assuming that if at least one account is found, then we switch to the state connected.
Notice how I’m using the length of the array to get a boolean value. The following statements are equivalent. If there’s at least one account the result is true, if the array is empty, the result is false.
| when array empty | when array not empty | |
|---|---|---|
!!accounts.length | false | true |
accounts.length ? true : false | false | true |
accounts.length > 0 | false | true |
In Web3, giving access to our wallet means giving reading access. The application won’t be able to withdraw our balance without our approval, but it will have access to read it. Let’s remember blockchain is about transparency, so giving reading access means the application will get to know our address, balance, and activity. In some cases, applications might ask for more permissions, so be careful when giving those permissions. For now, this demo only asks for reading access.
Every address is unique and only whoever has the private key will have access to the wallet, so don't lose your private key. An address is like an account, which as mentioned above will have a balance and activity. Reading information from blockchain doesn't require an address. However at some point, we might want to write something, and for writing an address (wallet) and some balance is required. For now, let's not worry about that and keep working on our tutorial.
OK, let’s also hide the button once the wallet is connected, which means adding a flag:
Snippet 6: Hiding the connect button if the wallet is connected
// pages/index.js

 ...
 <p className={styles.description}>
    {!walletConnected && <button onClick={connectHandler}>Connect</button>}
 </p>
 ...
The button will only be visible if walletConnected is true, meaning only when the wallet is connected to our application.
Then let’s take care of the styling part, let's replace the whole style jsx global tag:
Snippet 7: Altering styles to change background color when the wallet is connected
 // pages/index.js
 ...

 <style jsx global>{`
       html,
       body {
         padding: 0;
         margin: 0;
         font-family: -apple-system, BlinkMacSystemFont, Segoe UI, Roboto,
           Oxygen, Ubuntu, Cantarell, Fira Sans, Droid Sans, Helvetica Neue,
           sans-serif;
         ${walletConnected &&
         `
         background: black;
         color: white;
         `}
       }
       * {
         box-sizing: border-box;
       }
     `}</style>
Usually, it is better to switch CSS classes instead of having a string representing the styles. But for the demo, it should be fine altering the string.
In this case, if the flag is true, we are changing the background color to black and the font color to white. With the wallet connected, our frontend should look like this:
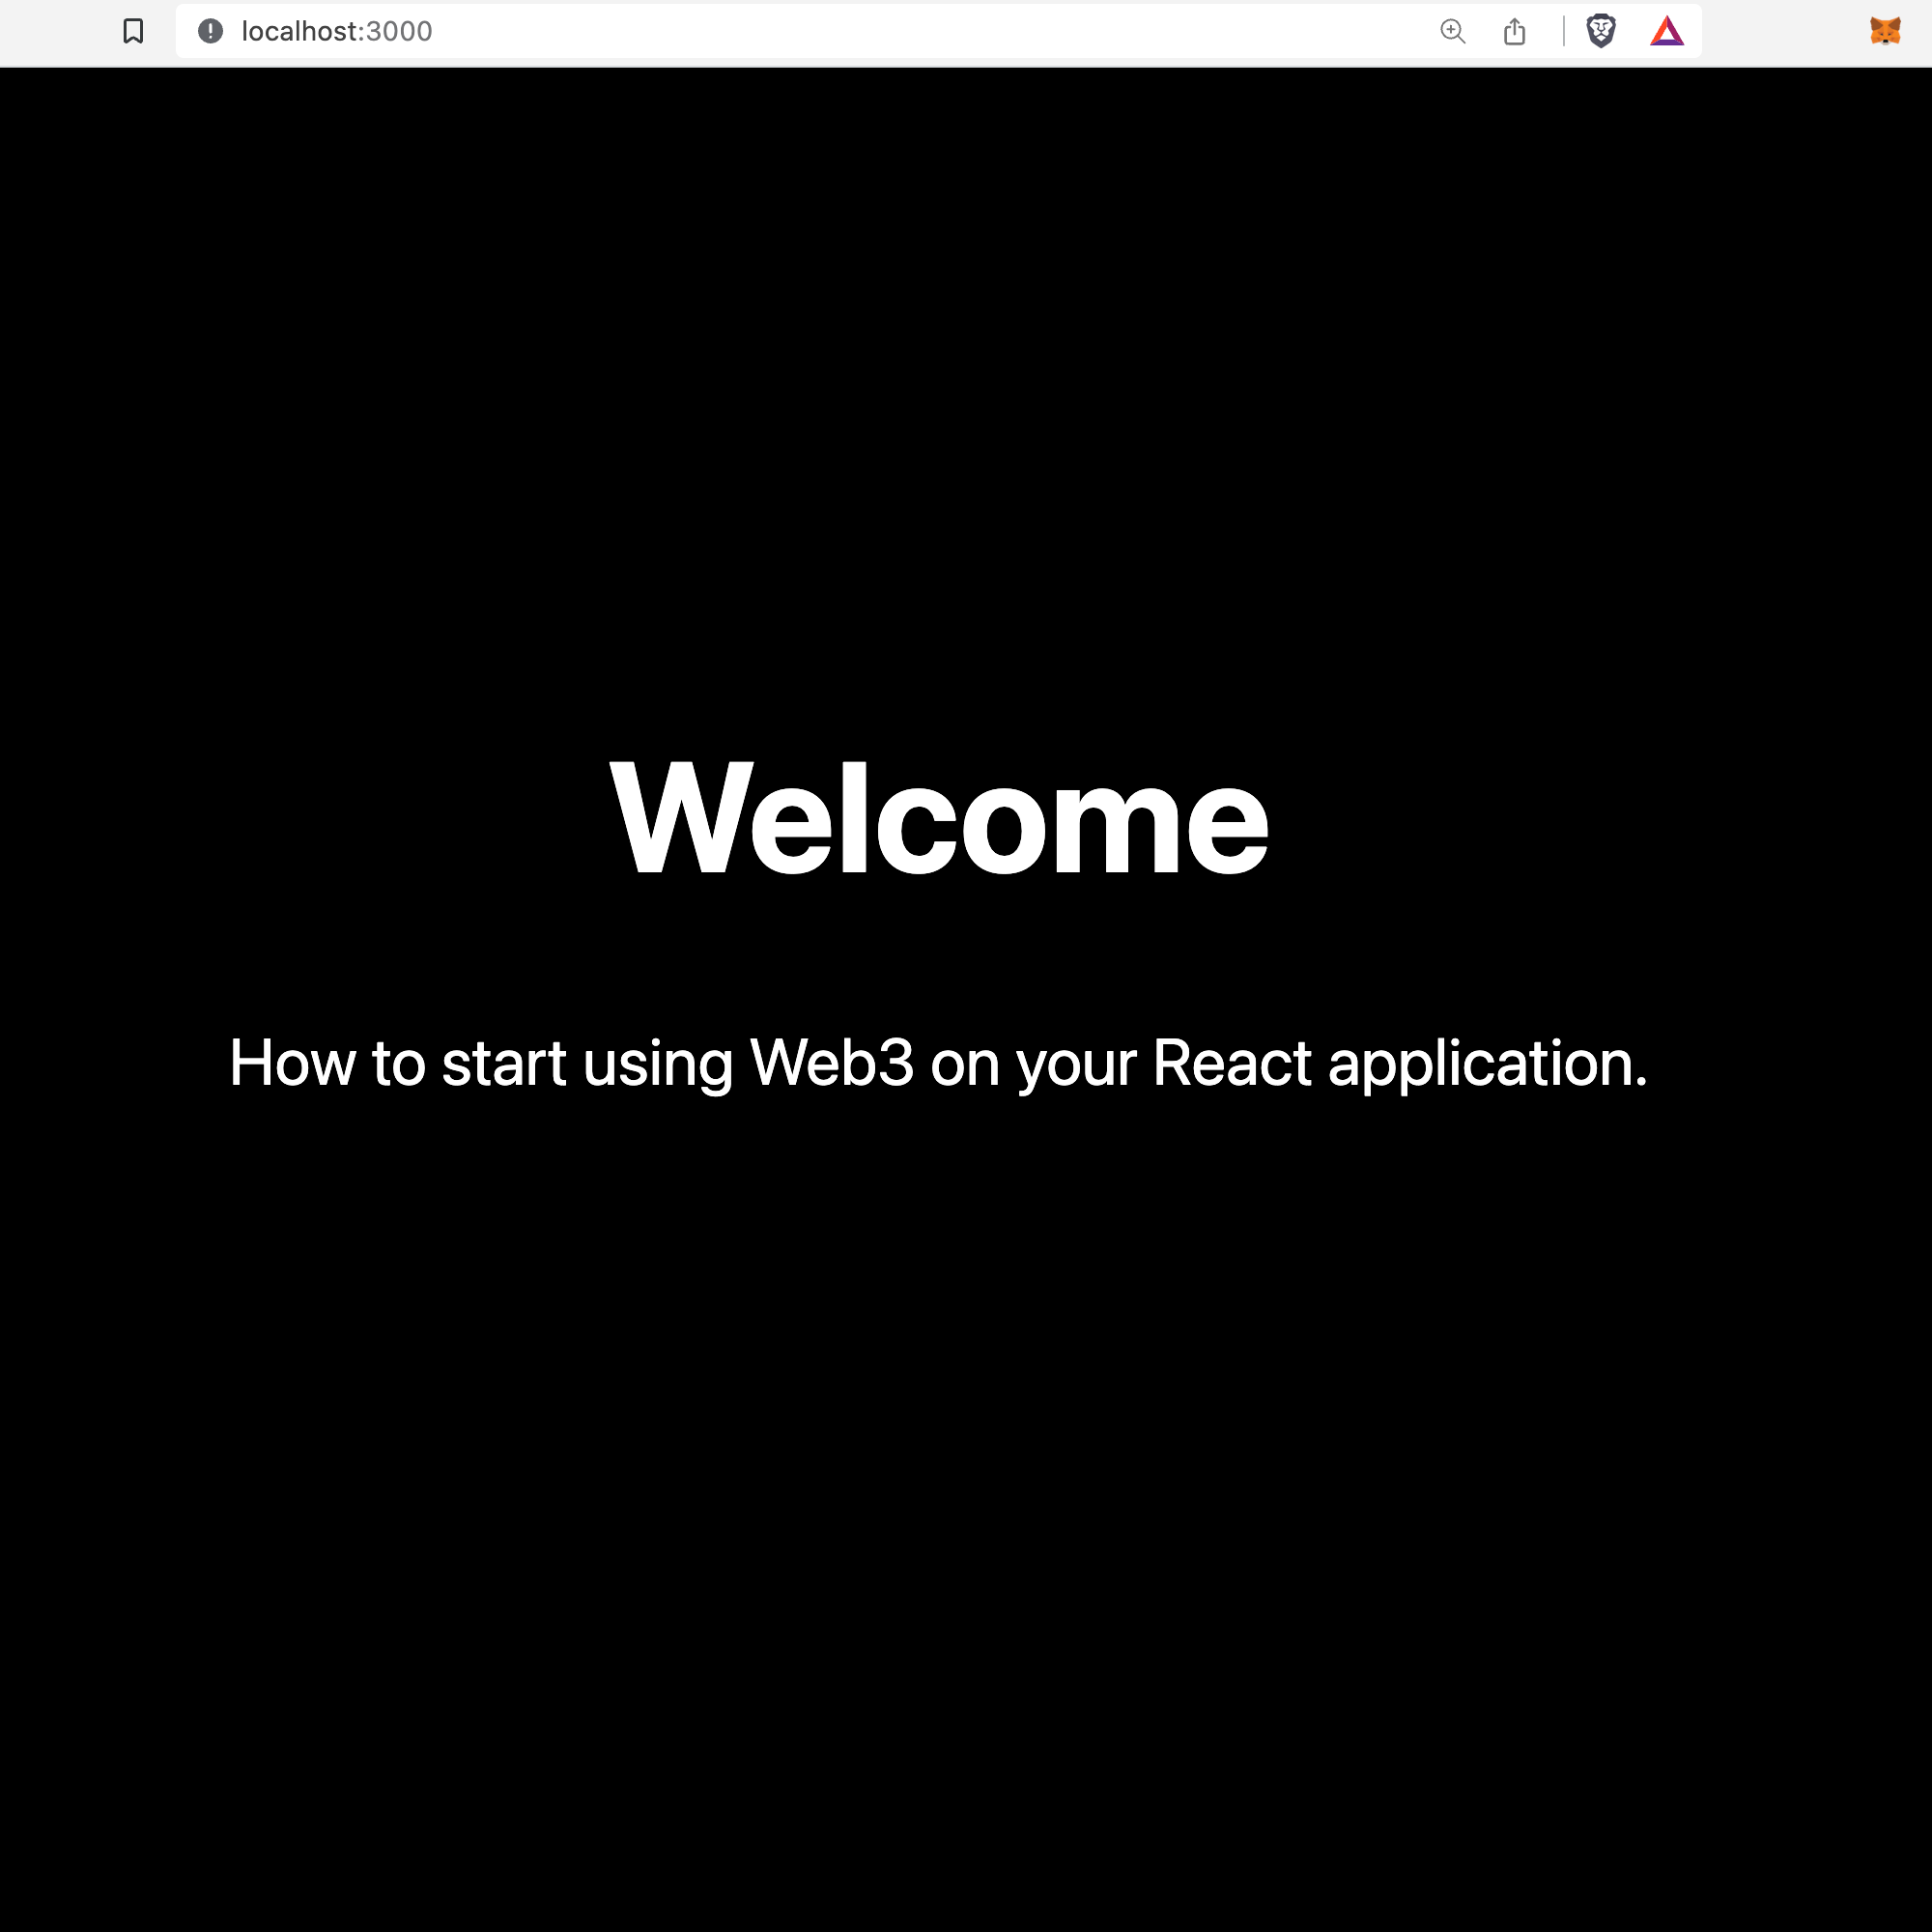 Fig. 9: The frontend responds to the connected wallet
OK, so our React application is responding to a Web3 action. That’s perfect. Now, if you open the Metamask extension you will see a disconnect option, which will revoke the application permissions to your wallet, click on it and disconnect the wallet.
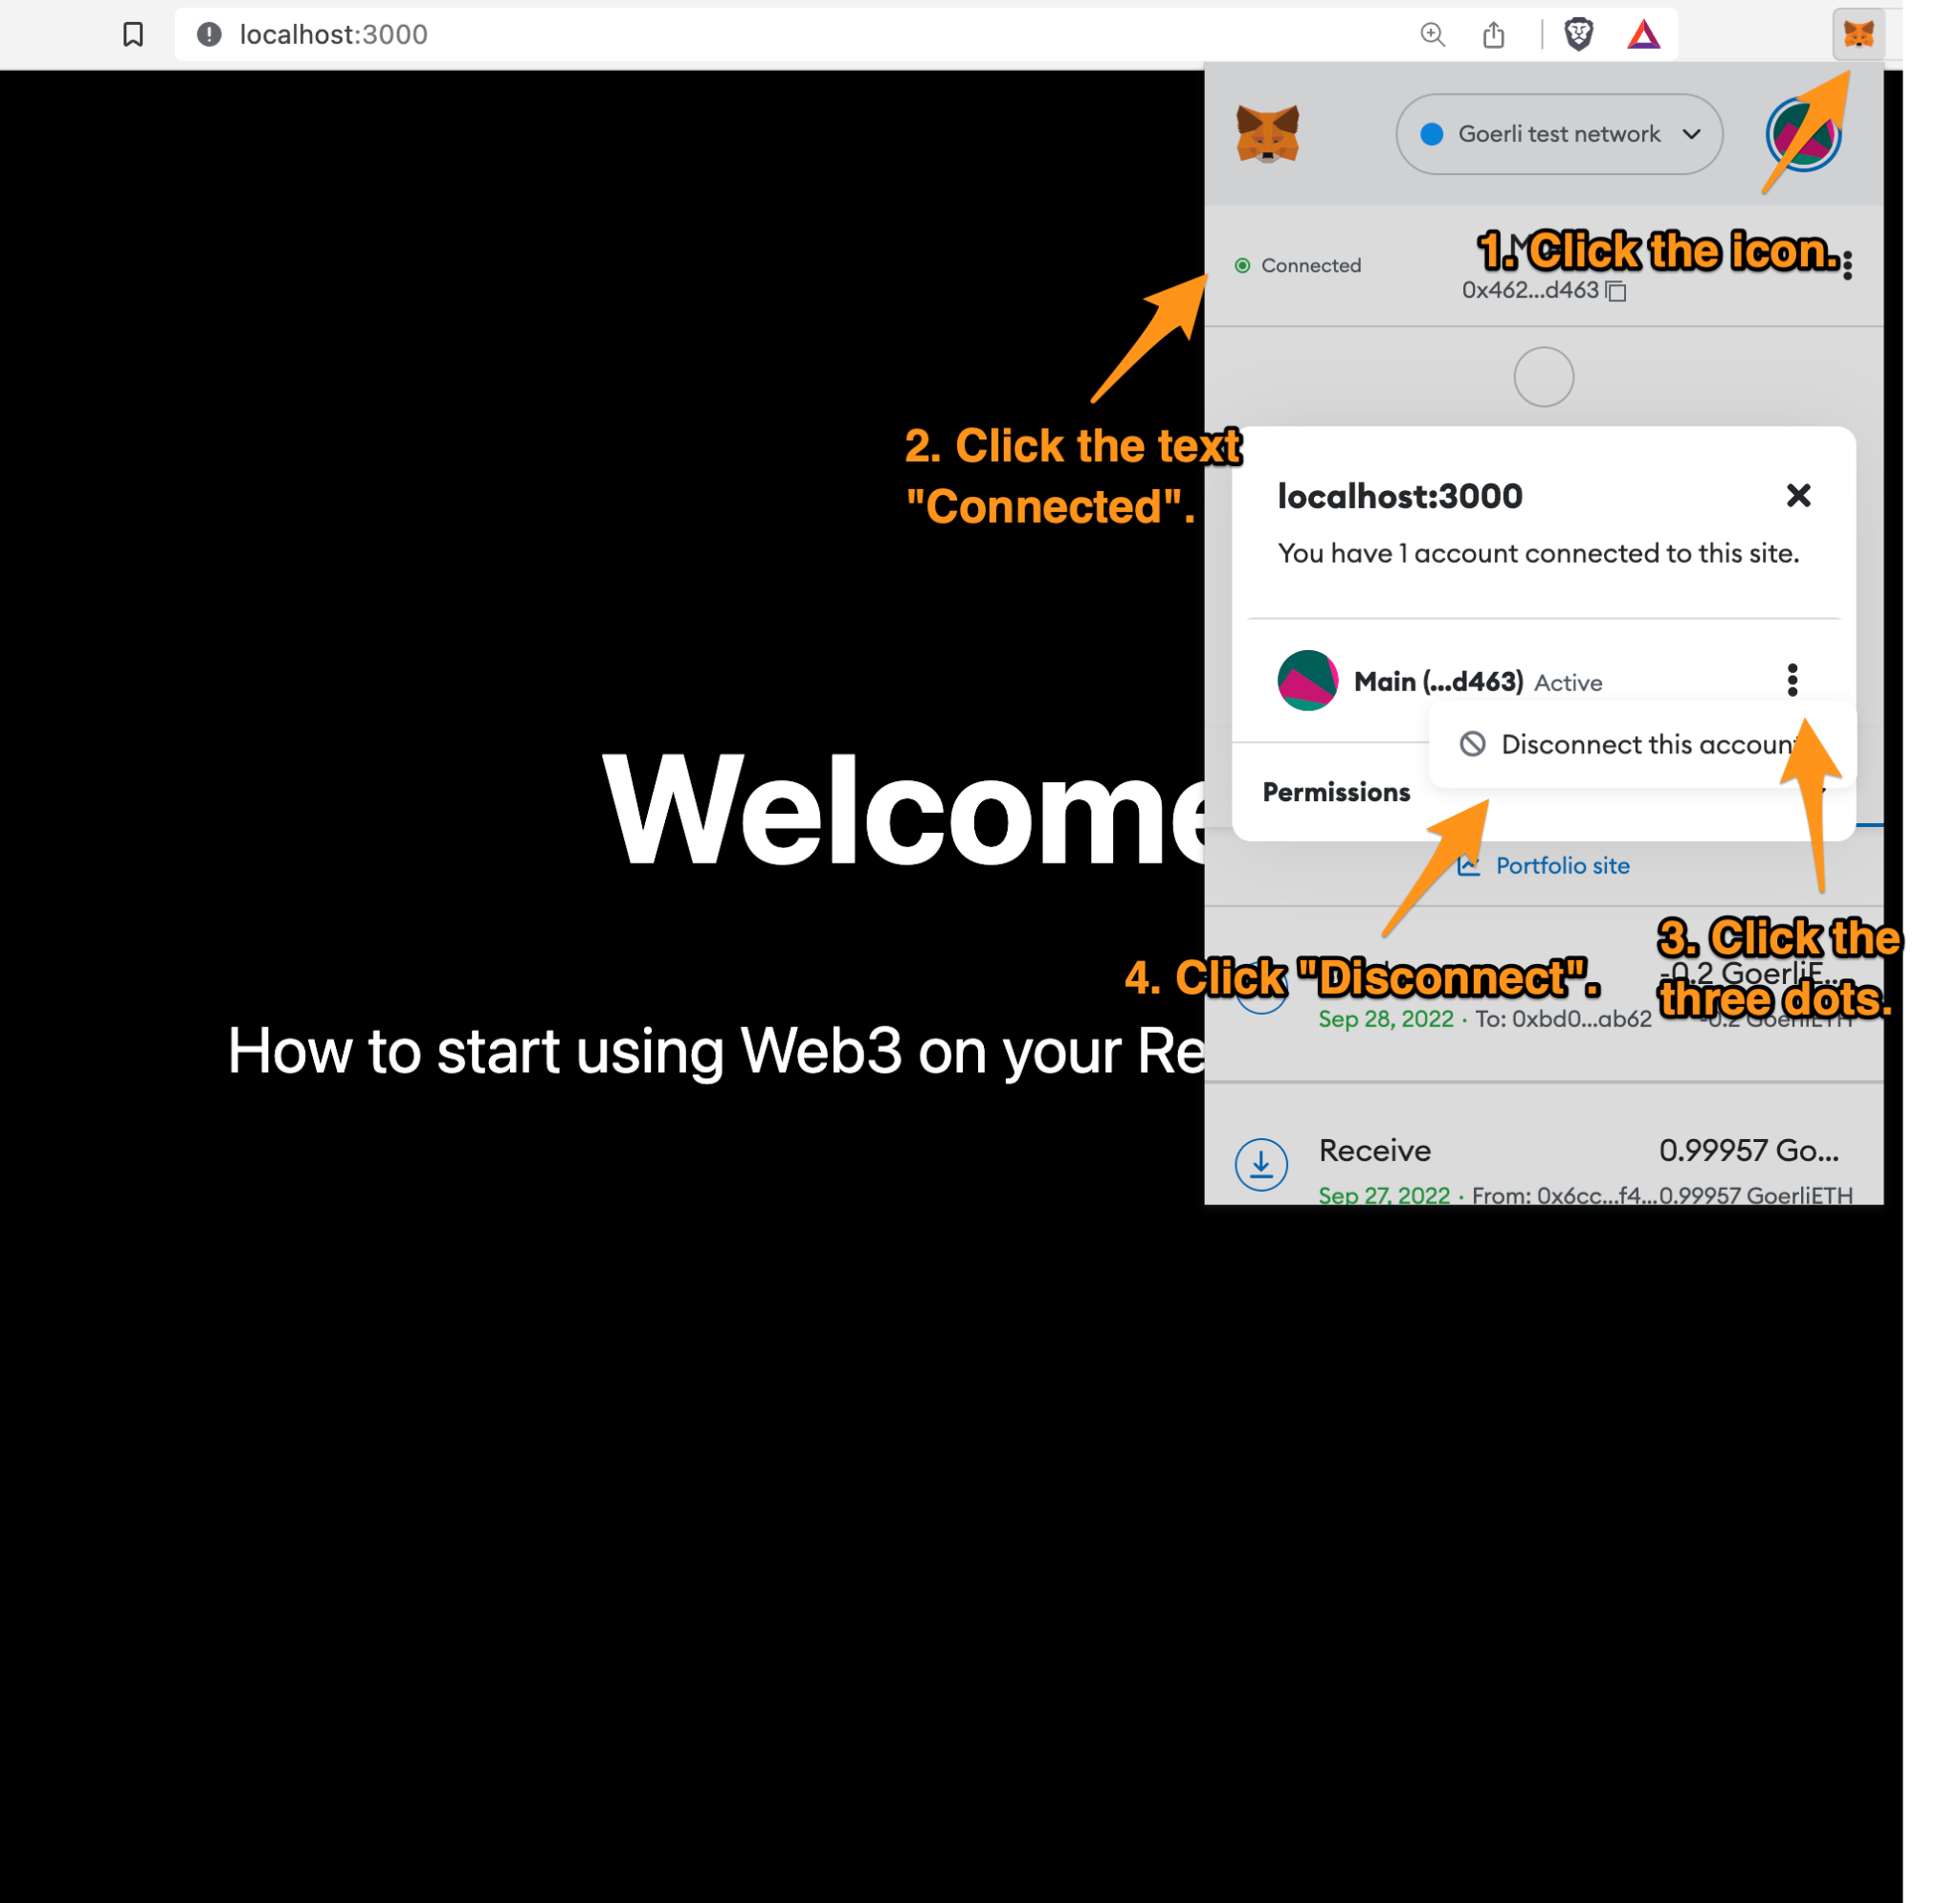 Fig. 10: How to disconnect your Metamask wallet
The wallet is disconnected now, but as you can see, our React application keeps displaying the black background ⬛ even when Metamask says “Not connected”. This happens because our application doesn’t know about Metamask activity. Remember Metamask is an extension and not part of our application. Luckily, there’s a way to add a listener. That should help.
We are going to include another React hook useEffect, to set up a listener on the event accountsChanged (opens in a new tab). This might be a bit tricky, but in a basic way, this is how most Web3 applications work to switch the state between “connected” and “disconnected”.
AccountsChanged provides an array of accounts connected to our front end, and we’re going to leave the responsibility of updating the state to this event.
-
If the event provides an empty array, it means, no account is connected and our application should show a white background ⬜ .
-
If the event provides an array not empty, it means, at least one account is connected and our application should show a black background ⬛.
Let’s remember that useEffect is executed when the component is mounted (in a class component it would be the equivalent of componentDidMount helper). In our case, it will be called once and will set up the listener.
Let’s add the following code:
Snippet 8: Use React hook useEffect to add listener: accountsChanged to detect if the account is disconnected from the wallet (Metamask)
// pages/index.js

 import { useState, useEffect } from "react";

 ...

 const [walletConnected, setWalletConnected] = useState(false);
 const connectHandler = async () => {
   try {
     await ethereum.request({
       method: "eth_requestAccounts",
     });
   } catch (error) {
     console.log(error);
   }
 };

 const login = (accounts) => {
   setWalletConnected(!!accounts.length);
 };

 const init = async () => {
   ethereum.on("accountsChanged", (accounts) => {
     login(accounts);
   });
 };

 useEffect(() => {
   init();
 }, []);

 ...
Notice how the responsibility of calling the login method was moved to the callback of accountsChanged. It used to be called from connectHandler, but eth_requestAccounts will always trigger an accountsChanged event, meaning we can make the event responsible for updating the state.
At this point, if we click the connect button and give access to the wallet, the background should switch to black ⬛. If we disconnect the wallet using Metamask, the background should switch to white ⬜ again. Nice!
There’s one more thing. If you refresh the page, you will see a white background ⬜. If you click the connect button, you will notice that you won’t get the Metamask popup. If you click the Metamask icon, you will see that the site is connected. However, the background color stays white ⬜ and according to our logic, it should be black ⬛ because the wallet is connected to the site.
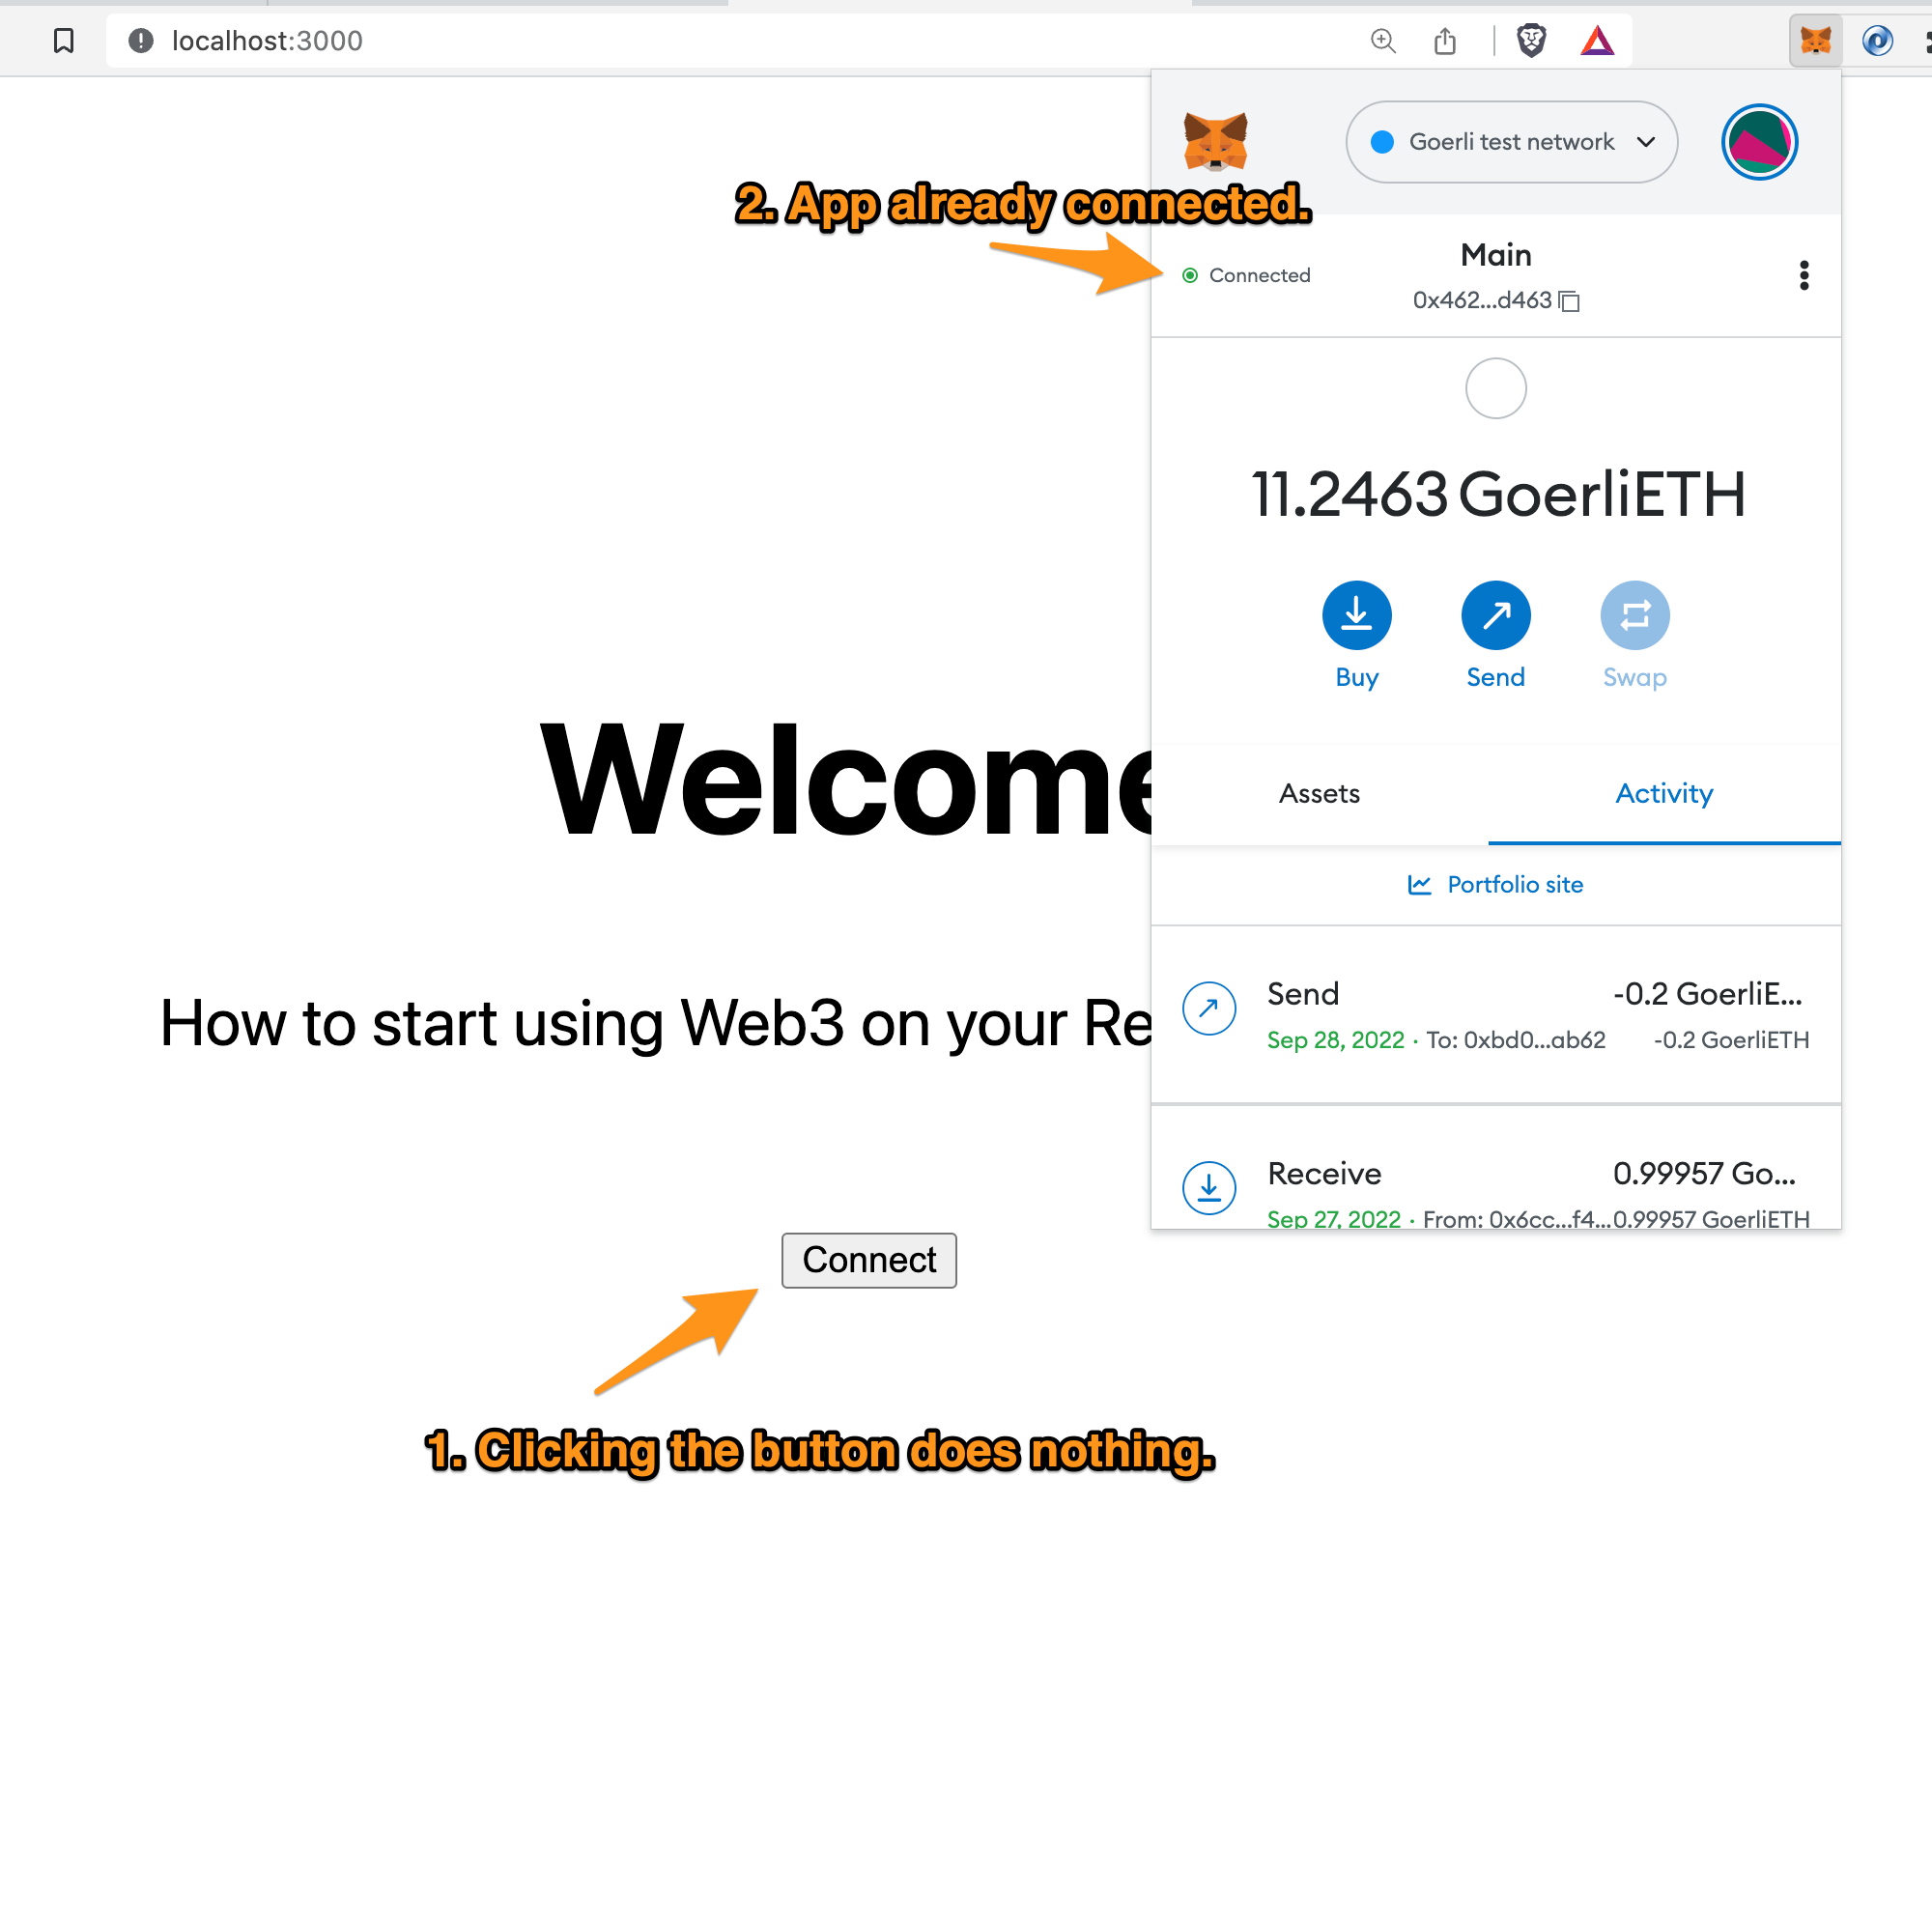 Fig. 11: The application is already connected but the background is white
What’s happening is that when the browser is refreshed. Our React application doesn’t check if there’s an account connected. This check only happens when the account is changed. Let’s fix this.
We are going to use another method called eth_accounts. This method returns the accounts already connected to our site. It’s similar to eth_requestAccounts, but as you can see, there’s no request in the name, meaning it doesn’t trigger the Metamask pop up.
It only returns the array of connected accounts. Again, the length of the array will help us set the walletConnected flag.
Snippet 9: Use the web3 method eth_accounts to check if the wallet is already connected
 // pages/index.js
 ...

 const login = (accounts) => {
   setWalletConnected(!!accounts.length);
 }

 const init = async () => {
   ethereum.on("accountsChanged", (accounts) => {
     login(accounts)
   });

   try {
     const accounts = await ethereum.request({ method: "eth_accounts" });
     login(accounts)
   } catch (error) {
     console.log(error);
   }
 };

 useEffect(() => {
   init();
 }, []);

 ...
Here, you can see how we are extending the init function, which is called once the component is mounted. It does two things: a) set the listener and b) check for connected accounts. If there are any, it will update the state accordingly.
Once you save the changes, the background should be black. Voila! You can keep refreshing the site and the background should be black ⬛ as long as the wallet is connected.
One last thing: it's always a good practice to verify that the ethereum object is available, meaning Metamask is installed. Otherwise, our application will break. So let’s add a check in our codebase to remind the user to install Metamask in case they haven’t done it yet.
Listing 10: Check that Metamask is installed
 // pages/index.js
 ...

 export default function Home() {
   const [metamaskInstalled, setMetamaskInstalled] = useState(false);
   const [walletConnected, setWalletConnected] = useState(false);

   ...

   const init = async () => {
     if (typeof ethereum === 'undefined') {
       return
     }

     setMetamaskInstalled(true);

     ethereum.on("accountsChanged", (accounts) => {
       login(accounts);
     });
     ...
   }

   ...

     <p className={styles.description}>
         {!metamaskInstalled ? (
           <a
             href="https://metamask.io/"
             target="https://metamask.io/download/"
           >
             Please Install MetaMask
           </a>
         ) : (
           !walletConnected && <button onClick={connectHandler}>Connect</button>
         )}
     </p>
 ...
We are using the React hook useState to set another boolean flag. If Metamask is not installed, then we’ll display the message: “Please Install Metamask”, otherwise the app should work as expected.
Notice how the ethereum object is being checked by using typeof, and doing an early return in case it is not found. This means it won’t set the listener or get the connected accounts. Finally, the interface also adds a check to display either the message or the button depending on the flag's value.
Summary
Good, let’s recap:
-
A next.js application was set up.
-
A Metamask extension was installed.
-
The application interacts with the object ethereum.
-
Two web3 methods were integrated:
eth_requestAccountsandeth_accounts. -
The application uses two React hooks:
useStateanduseEffect. -
The page's background reflects the wallet states: connected and disconnected.
As you can see, it is very easy to start working with Web3 and luckily React makes things even easier.
This tutorial is only the beginning. At this point, we don’t need any balance, so it doesn’t matter which network you are connected to: Main or Test, the demo will work the same. This might be simple, but every Web3 application will start with a way to connect your wallet.
Get in touch
You can find the whole code on GitHub (opens in a new tab).
Also, make sure to visit the demo page (opens in a new tab).
I would love to hear your feedback (opens in a new tab) and if you have any questions please send me a line (opens in a new tab), I’ll be more than happy to answer them.
Special thanks to my friend Alex (opens in a new tab), who helped me proofread the tutorial.
Post originally published on devm.io (opens in a new tab)